
Pest Control for Rodents: How to Get Rid of Them for Good
You hear scratching in the attic at 2 a.m., find droppings in the pantry, or notice chew marks on a baseboard, and suddenly you're googling pest control rodent solutions at midnight. Rodents don't announce themselves until the infestation is already established, and by then a single trap in the garage won't cut it.
Getting rid of rats and mice for good means combining exclusion, sanitation, and targeted trapping or baiting, not just reacting to the latest sighting. Effective residential rodent control starts with figuring out how they're getting in, since a mouse only needs a gap the size of a dime to squeeze through your foundation or roofline.
This guide walks through how to identify which rodent you're dealing with, the DIY steps worth trying first, and when a professional inspection actually saves you money versus repeated trips to the hardware store. We've handled rodent problems across Sacramento, Roseville, and Elk Grove homes for over two decades, so we'll also flag the warning signs that mean it's time to call in a licensed exterminator before the damage spreads to your wiring or insulation.
Understanding your rodent problem before you act
Rodents don't stay put once they've found a warm attic or a stocked pantry. A single female house mouse can produce 5 to 10 litters a year, with up to a dozen pups per litter, which means what looks like a two-mouse problem in September can be a rodent infestation of 30 or more animals by winter. That's why chasing individual sightings with a snap trap here and a glue board there rarely works long term. You're not fighting one mouse, you're fighting a breeding population that's already established nesting sites you probably haven't found yet.
A rodent problem you can hear is already a rodent problem you can't solve with one trap.
Why waiting costs you more than money
Beyond the gross-out factor, rodents create real health and structural risks that get worse the longer they stay. Mice and rats carry pathogens linked to hantavirus, salmonellosis, and leptospirosis, and their droppings can trigger asthma symptoms in kids and older adults, according to the CDC's guidance on rodents. Chewing is the other half of the problem. Rodents gnaw constantly to keep their incisors from overgrowing, and they don't discriminate between drywall, PVC pipe, and electrical wiring. Damaged wiring inside walls or attics is a documented cause of house fires, which turns a pest problem into a safety problem fast.
- Disease exposure : droppings, urine, and nesting materials can contaminate food prep surfaces and stored food.
- Structural damage : gnawed insulation, joists, and ductwork reduce energy efficiency and can require costly repairs.
- Fire risk : chewed electrical wiring is a leading hidden cause of residential fires traced back to rodent activity.
- Secondary infestations : rodent nests attract fleas, mites, and other pests that ride along on their bodies.
Signs your home already has a problem, not just a scare
Catching a rodent problem early makes every later step easier, so it helps to know what counts as evidence versus a one-off event. Grease marks along baseboards, matchstick-sized droppings near food storage, and shredded paper or fabric tucked into corners are all signs of an established presence, not a passing visitor, and they also help you sort rat signs from mouse signs. Nighttime scratching in walls or ceilings, especially in a consistent spot, usually points to a nest rather than a rodent just passing through.
| Sign | What it usually means |
|---|---|
| Droppings near food or in drawers | Active feeding site, likely daily traffic |
| Gnaw marks on wood, wire, or plastic | Established nest close by |
| Grease smudges along walls | Regular travel path used repeatedly |
| Scratching sounds at consistent times | Nesting activity, often in attic or wall voids |
| Pet acting alert or agitated at walls | Rodent movement your pet can hear or smell |
Getting a handle on residential rodent control starts with recognizing that these signs point to a population, not a single animal. If you're seeing two or more of the signs above, treat it as an active infestation and move straight into inspection and identification, which is exactly what the next step covers.
Step 1. Identify the rodent and inspect your property
Before you buy a single trap, figure out exactly what you're dealing with. House mice, roof rats, and Norway rats behave differently, nest in different spots, and respond to different bait, so treating a rat problem like a mouse problem wastes time and money. This is where pest control rodent work actually starts, not with a trap purchase, but with a walkthrough of your property using flashlight, gloves, and a notepad.
Telling the species apart
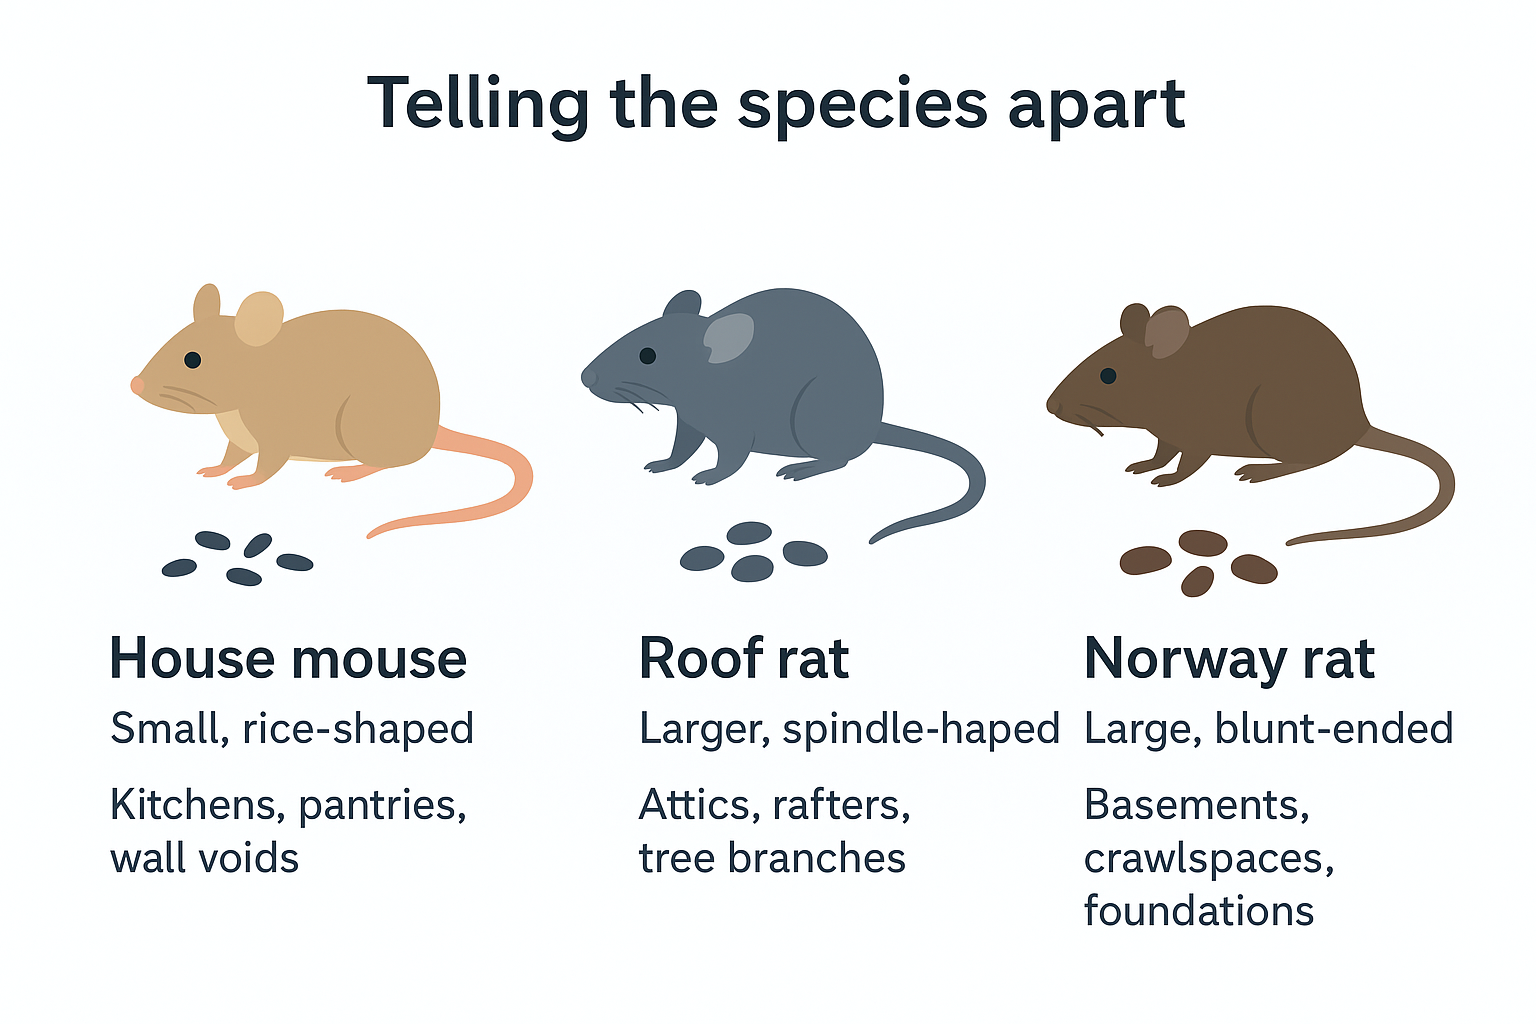
Droppings are your fastest clue, and a rodent identification library makes the comparison easier. Mouse droppings look like small dark grains of rice, roughly a quarter inch long, scattered near food sources. Rat droppings are noticeably bigger, closer to the size of an olive pit, and often clustered along a single travel path. Roof rats favor attics, rafters, and tree lines since they're strong climbers, while Norway rats stick closer to the ground, burrowing near foundations, woodpiles, and crawlspaces.
| Rodent | Droppings | Typical location | Common entry point |
|---|---|---|---|
| House mouse | Small, rice-shaped | Kitchens, pantries, wall voids | Gaps the size of a dime |
| Roof rat | Larger, spindle-shaped | Attics, rafters, tree branches | Roofline, vents, utility lines |
| Norway rat | Large, blunt-ended | Basements, crawlspaces, foundations | Foundation cracks, gaps under doors |
Where to inspect first
Grab a flashlight and check the places rodents actually use, not just where you last saw one. Attics, garages, under sinks, along baseboards, and behind large appliances are the usual hot spots. Look for gnaw marks on wood or wiring, grease smudges along frequently used paths, and any gaps around pipes or vents where daylight shows through, mapping every hidden gap mice use as you go.
If you can identify the species and the entry point, you already know 80% of what a professional would tell you.
Inside, focus on the kitchen, pantry, and any storage boxes stacked against exterior walls. Outside, walk the full perimeter of your foundation, checking under decks, around AC units, and where utility lines enter the house. Sacramento's older homes, especially in neighborhoods with raised foundations, tend to have more crawlspace access points than newer builds in Elk Grove or Roseville, so budget extra time there. Note every gap, dropping pile, and gnaw mark you find. That inspection map becomes your action plan for the next three steps, and it's the same information a licensed exterminator would gather on a paid visit.
Step 2. Remove food, water, and shelter sources
Once you know what you're dealing with, cutting off supply lines matters more than any trap you'll buy. Rodents need three things to stick around: food, water, and shelter . Remove any one of those and your house becomes a lot less attractive than the yard next door.
A pantry rodents can't reach is worth more than a dozen traps.
Cut off the food supply
Store dry goods, pet food, and birdseed in airtight containers , not the paper or cardboard packaging they came in, since a mouse chews through cardboard in seconds. Wipe down counters nightly, sweep up crumbs under appliances, and don't leave pet bowls out overnight. Outside, keep compost bins sealed and move bird feeders away from the house, since spilled seed is one of the most common food draws we see during pest control rodent inspections across Sacramento yards.
Deny water and clear the clutter
Fix dripping faucets, leaky irrigation lines, and pooling water near your foundation, since rodents can survive on very little food if water's easy to find. Garages and sheds packed with boxes, old furniture, or firewood stacked against the house give rodents both cover and nesting material , so thinning that clutter removes shelter they'd otherwise use to breed undisturbed, which matters most for ground-dwelling burrowers handled by Norway rat extermination.
Turn these habits into a routine, not a one-time cleanup:
- Store food in sealed containers, including pet food and birdseed.
- Take out trash nightly and use bins with tight-fitting lids.
- Fix leaky pipes, hose bibs, and AC condensation lines.
- Keep firewood and debris at least 18 inches off the ground and away from siding.
- Trim vegetation and tree branches back from the roofline.
Sanitation work like this is exactly what our residential rodent control technicians check first during a service visit, since no bait station outperforms a house with nothing left to eat. If your property still shows activity after a thorough cleanup, that's a sign you're dealing with an established population that needs the exclusion work covered next.
Step 3. Seal entry points to keep rodents out
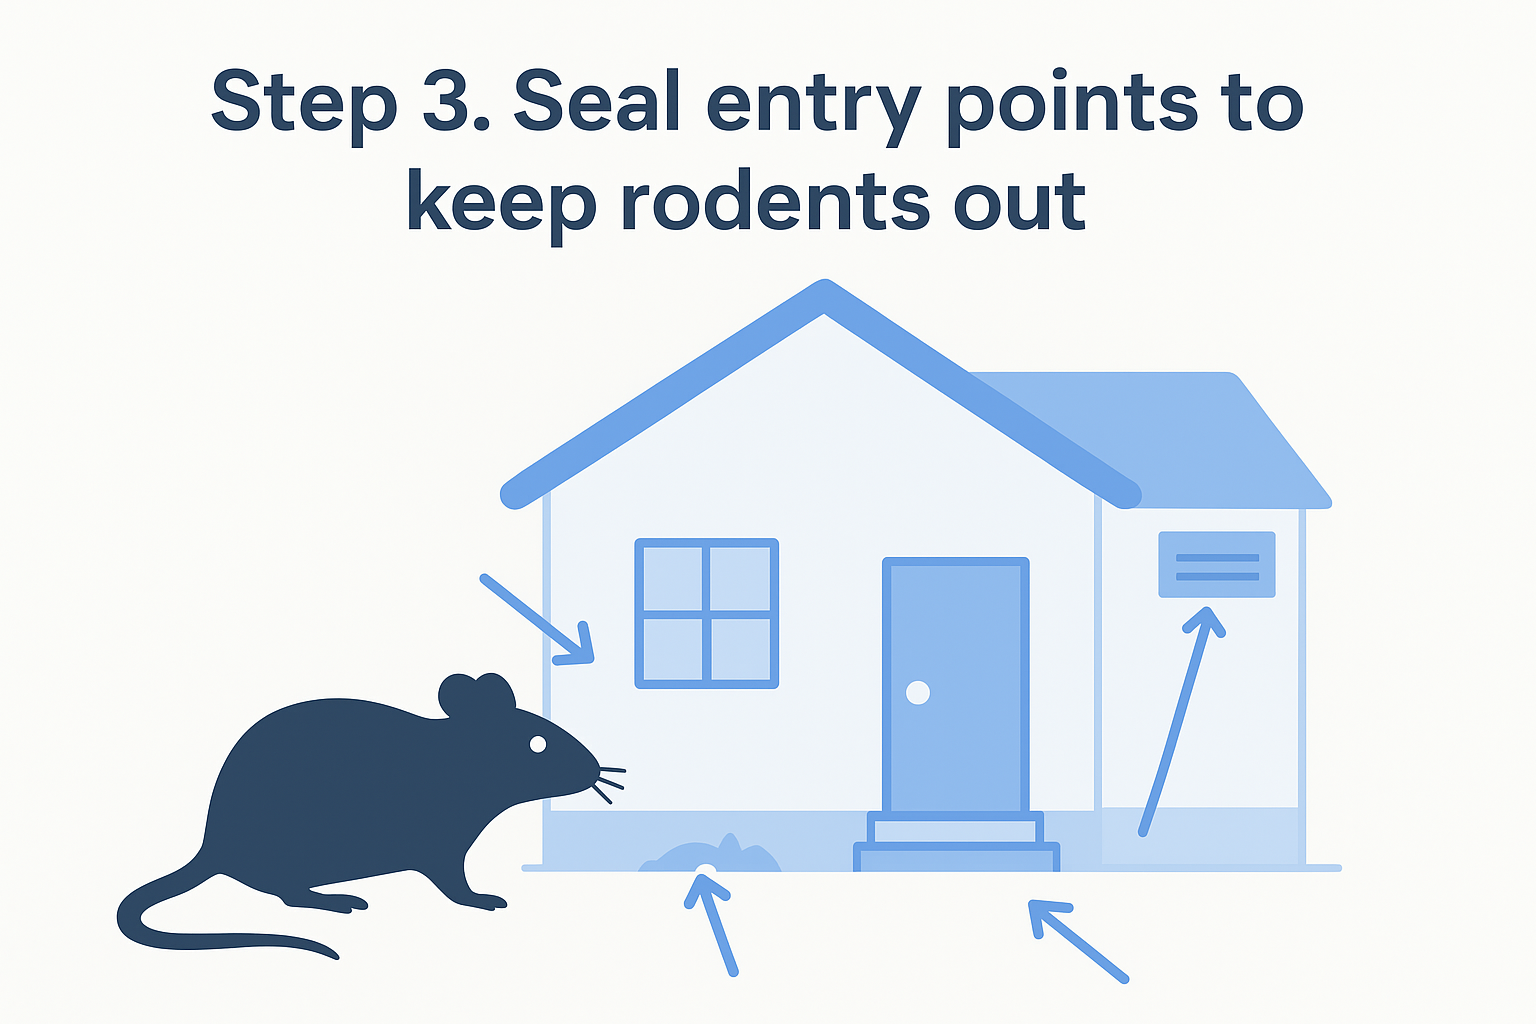
Sanitation slows rodents down, but exclusion is what actually stops them . If a mouse can still squeeze through a gap under your garage door or a gap around a dryer vent, it will keep coming back no matter how clean your kitchen is. This step is where residential rodent control shifts from managing symptoms to closing the door on the problem for good, literally.
Materials that actually stop rodents
Not every sealant works. Foam and caulk alone are a snack to a rat with a determined jaw, so pair them with something rodents can't chew through, following permanent DIY fixes for sealing mouse gaps.
| Material | Best for | Why it works |
|---|---|---|
| Steel wool + caulk | Small gaps around pipes | Wool resists chewing, caulk locks it in place |
| Hardware cloth (1/4 inch) | Vents, crawlspace openings | Rigid mesh blocks entry without blocking airflow |
| Copper mesh | Weep holes, small cracks | Won't rust, hard for rodents to gnaw through |
| Door sweeps | Garage doors, exterior doors | Closes gaps rodents use as primary entry points |
Foam alone isn't a barrier, it's an invitation with extra steps.
Where to focus your sealing work
Start with the entry points you flagged during your inspection in Step 1, since that walkthrough already told you where daylight, drafts, or droppings gave the location away. Work through this checklist methodically rather than patching whatever's closest:
- Gaps around utility pipes, gas lines, and cable entries, sealed with steel wool and caulk
- Vents and crawlspace openings, covered with 1/4-inch hardware cloth
- Gaps under exterior and garage doors, fixed with a proper door sweep
- Roofline gaps, soffit vents, and areas where tree branches touch the roof, especially important for roof rats
- Foundation cracks and gaps around window wells, patched with mortar or expanding foam backed by mesh
Garages deserve extra attention since they're one of the most common overlooked entry points in Sacramento homes, particularly older ones with worn weatherstripping. Homes near greenbelts or creek areas in Elk Grove and Roseville also see more foundation gaps from settling soil, so check those spots twice. If you find more than a handful of entry points, or you're not confident sealing near gas lines and rooflines yourself, that's a reasonable point to bring in a licensed exterminator who can finish the exclusion work safely and correctly the first time, and it helps to know how much professional mouse exclusion costs in Sacramento.
Step 4. Trap, bait, and monitor for results
With food sources cut off and entry points sealed, trapping finishes the job by removing whatever population is already inside your walls or attic. Skipping straight to this step without doing Steps 2 and 3 first is why so many DIY efforts fail, since new rodents just replace the ones you catch, which is exactly what integrated pest management for rodents is built to prevent. Once exclusion is done, trapping and baiting become a cleanup operation instead of an endless chase.
Choosing the right trap for the job
Snap traps remain the most reliable option for both mice and rats, and they're far more sanitary than glue boards, which cause slow deaths and don't address the animal's location if it drags the trap into a wall void. Bait stations with rodenticide work well outdoors or in areas kids and pets can't reach, but indoor use around a family home carries real risk, so we generally recommend mechanical traps inside and stations only in secured exterior zones, one of several rat trapping and baiting methods worth comparing.
| Trap type | Best location | Notes |
|---|---|---|
| Snap traps | Attics, garages, wall voids | Fast, humane, easy to check |
| Multi-catch traps | Kitchens, pantries | Good for ongoing monitoring |
| Bait stations | Exterior perimeter only | Keep locked, away from pets and kids |
| Glue boards | Avoid indoors | Inhumane and often ineffective on rats |
A trap placed in the wrong spot catches nothing, no matter how good the bait is.
Placement and monitoring that actually work
Set traps perpendicular to walls, since rodents travel along edges rather than crossing open floor space. Bait with peanut butter or nesting material like cotton for mice, and use protein-based bait for rats, which prefer meat and fish over sweets. Check every trap within 24 to 48 hours, both to reset it and to confirm you're not letting a catch sit and decompose in a wall cavity.
Keep a simple log of catches by location and date. If activity drops to zero for two full weeks, your residential rodent control effort worked. If you're still catching rodents after three or four weeks of consistent trapping, that usually means you missed an entry point or a nest, and it's time for a professional inspection rather than buying more traps. A licensed technician can also place tamper-resistant bait stations and track activity with equipment most homeowners don't have access to, which speeds up the timeline considerably on stubborn infestations, and it's worth knowing what professional rodent removal runs before you decide.
Keeping your home rodent-free for good
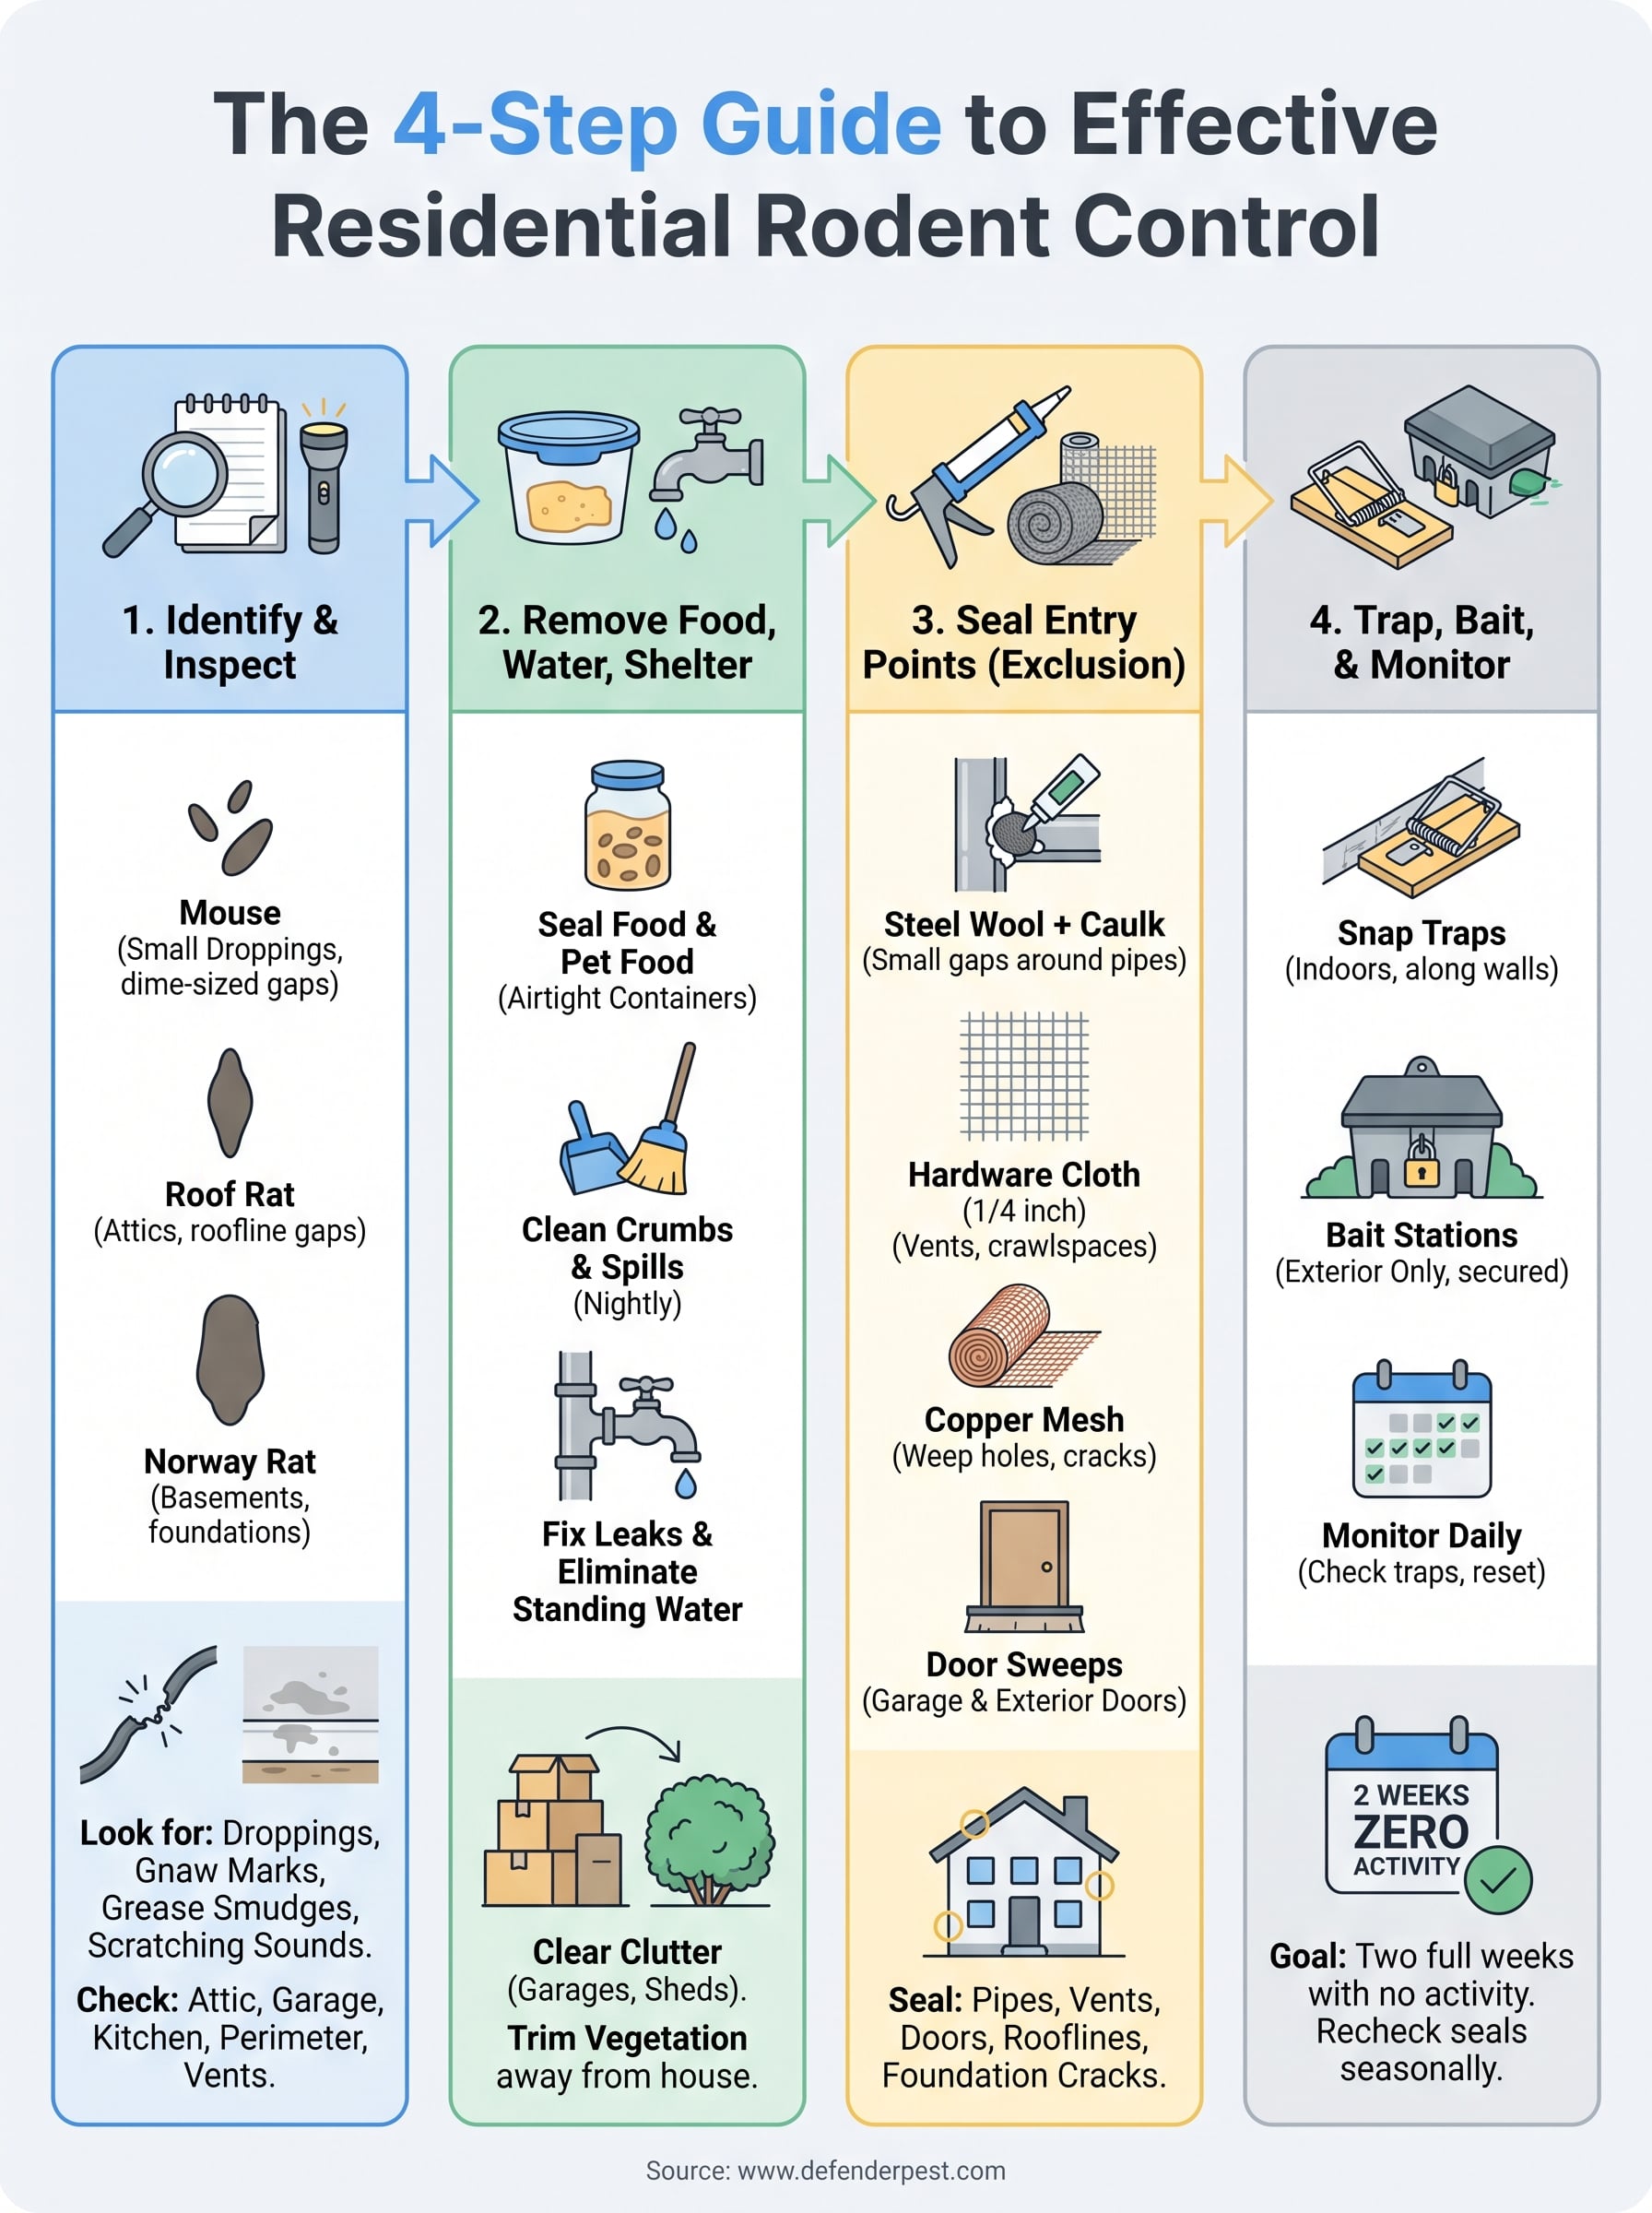
Getting rid of rodents for good comes down to sequence, not luck. Identify the species, cut off food and shelter, seal every gap wider than a dime, then trap what's left inside. Skip a step and you're back to square one within a season, chasing sightings instead of solving the actual problem. Homes that stay rodent-free treat exclusion and sanitation as ongoing habits, not a one-time weekend project, and they recheck seals every fall before rodents start looking for winter shelter.
Quarterly checks of your foundation, roofline, and garage door sweep catch small gaps before they become entry points. If you've worked through all four steps and you're still hearing scratching at night, that's not a sign to buy more traps, it's a sign something's still getting in. At that point, a professional inspection pays for itself in the damage it prevents. Get a free quote for Sacramento rat and rodent control from Defender Termite & Pest Management and let a licensed technician find what your walkthrough missed.