How To Find Entry Points For Mice: A Step-By-Step Guide
You hear scratching in the walls at night. You find droppings in the pantry. You know mice are getting in, but you can't figure out where. Learning how to find entry points for mice is the single most important step in solving a rodent problem, because traps and bait won't help much if new mice keep walking through the front door.
Mice can squeeze through gaps as small as a dime, which means the entry points hiding around your home are often in spots you'd never think to check. At Defender Termite & Pest Management, we've been tracking down these hidden access points for Sacramento-area homeowners since 1999, and we've seen just about every way a mouse can get inside a structure. Most infestations we treat come down to a handful of overlooked gaps and cracks that are easy to find once you know where to look.
This guide walks you through a step-by-step process to inspect your home from foundation to roofline, identify the most common entry points , and understand when it's time to call in professional rodent control . Grab a flashlight and let's get started.
What you need before you start
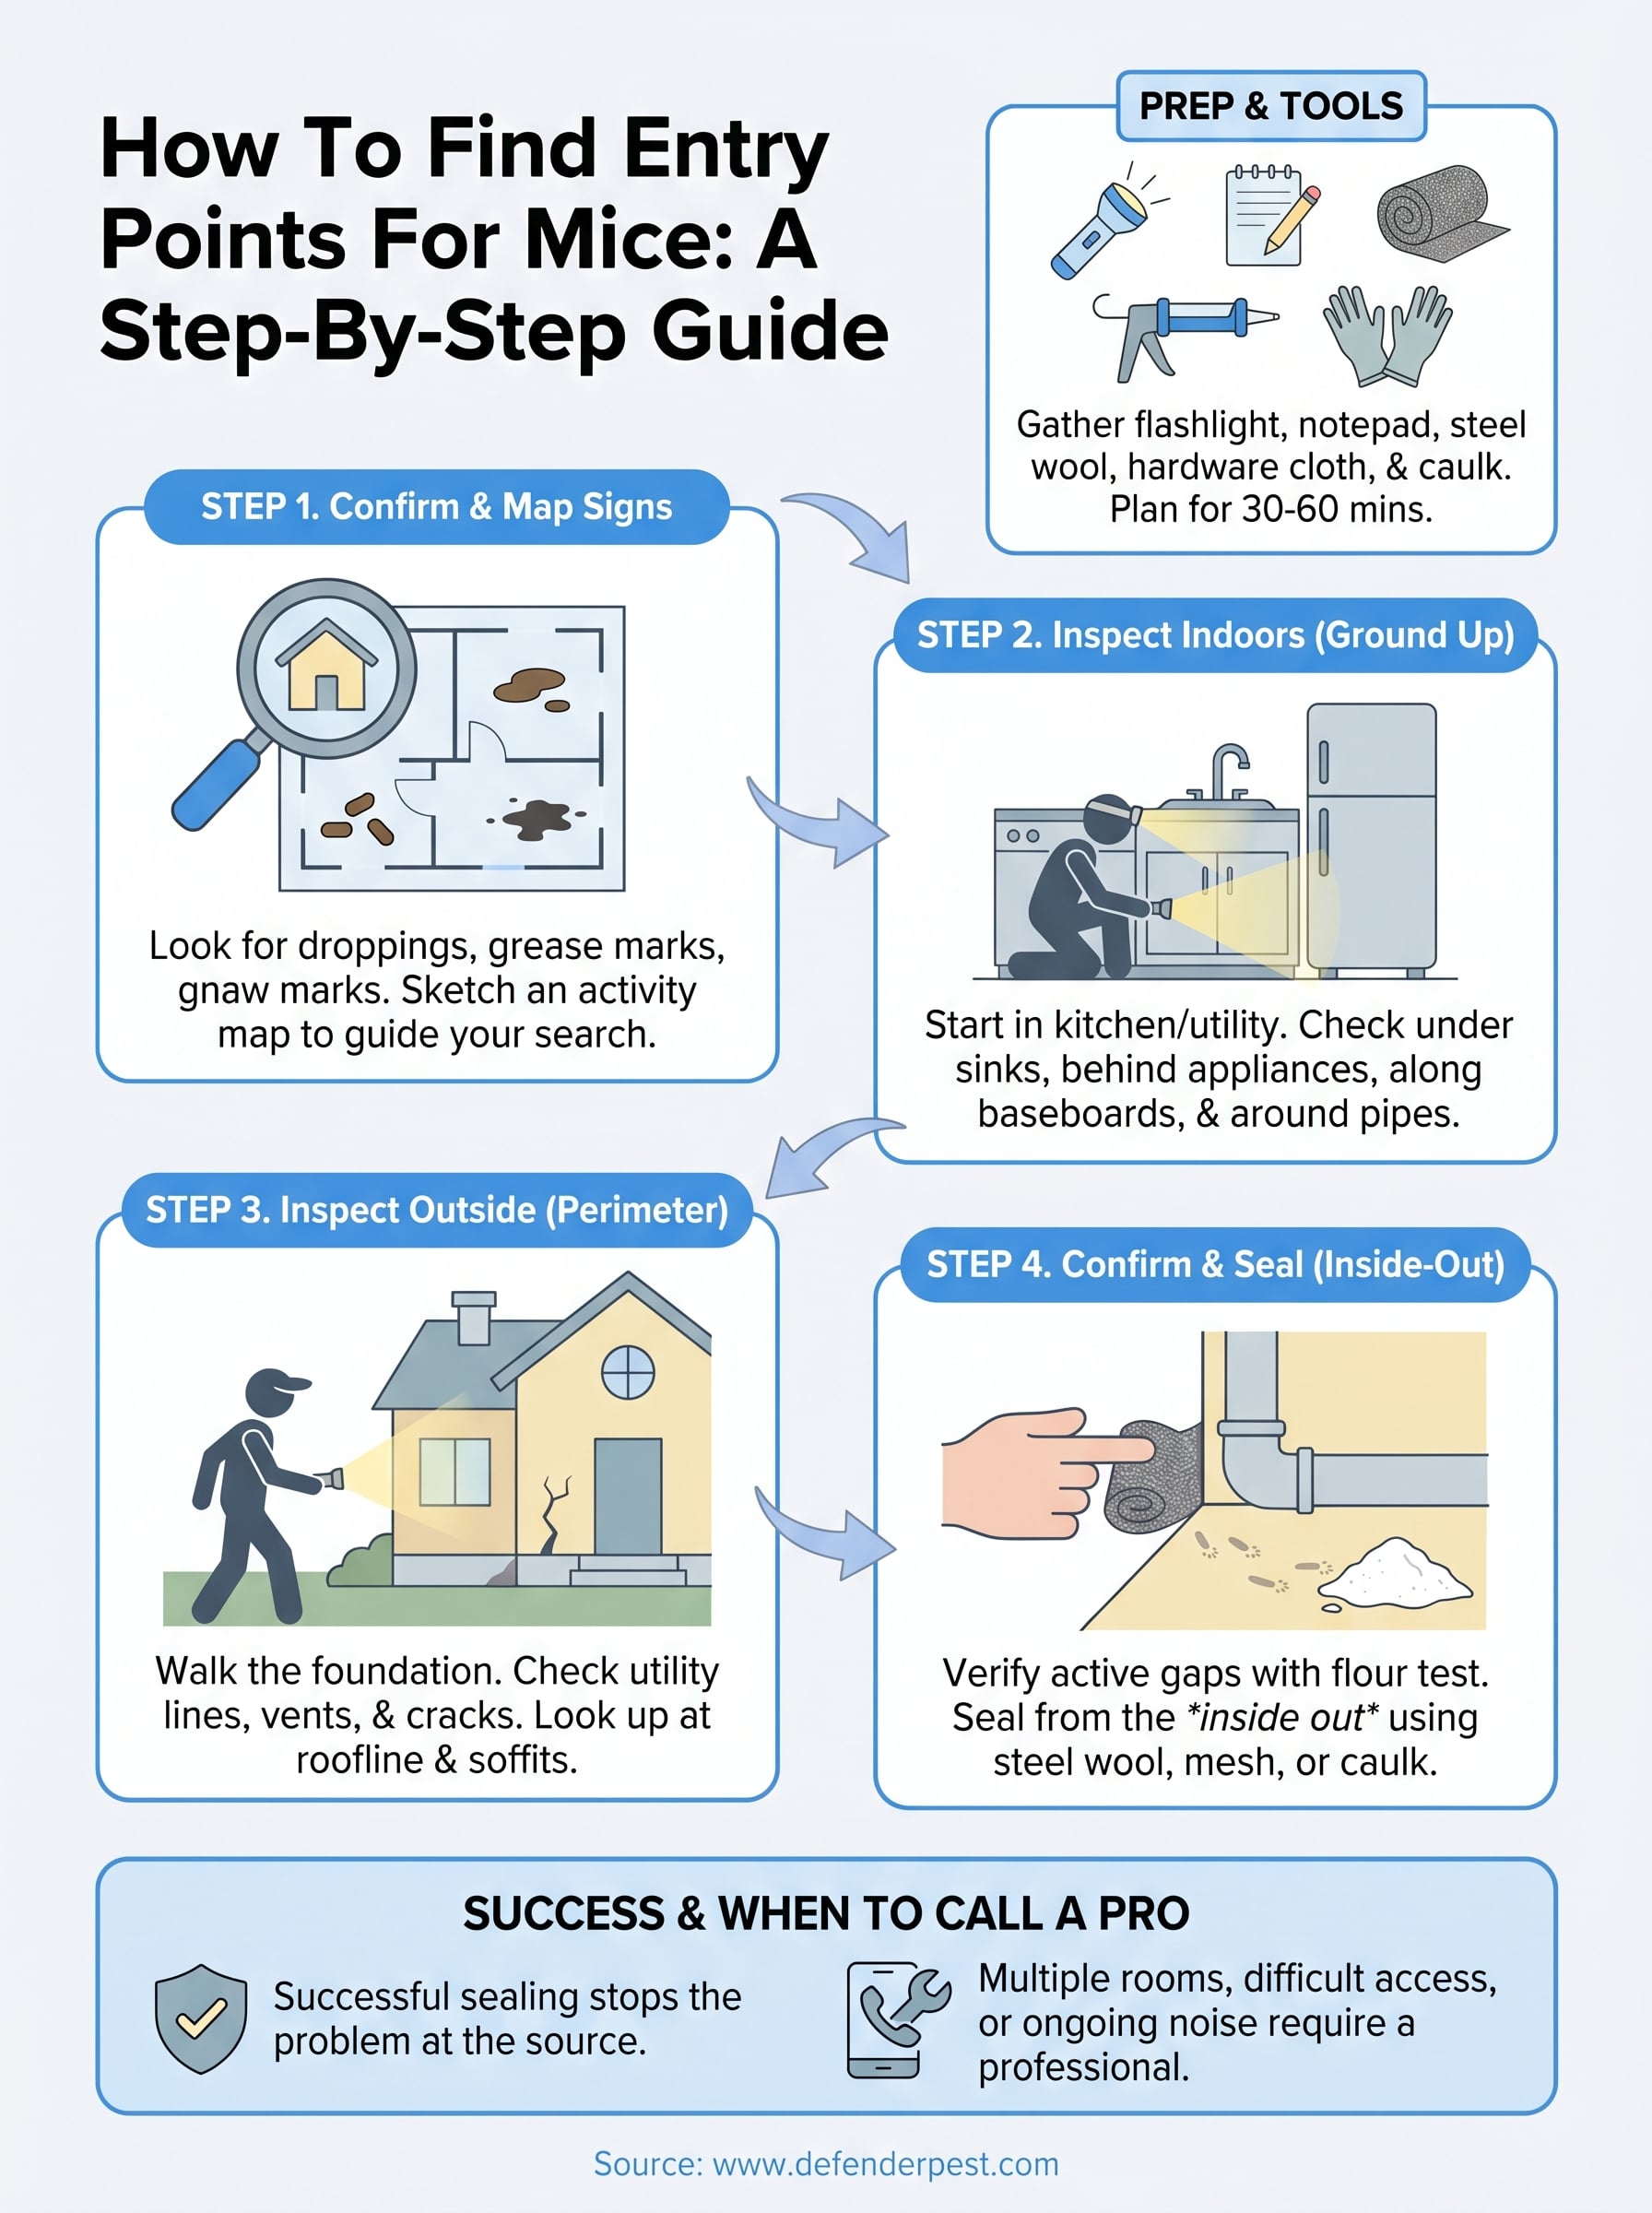
Before you start learning how to find entry points for mice, gather your supplies. A proper inspection takes 30 to 60 minutes , and stopping mid-search to hunt for a flashlight breaks your focus. Having everything in hand before you walk the perimeter means you can document and mark each gap as you find it without losing your place.
Tools for the inspection
You need a few basic items to do this right. A bright flashlight or headlamp is the most important tool on the list, since most entry points hide in dark corners, crawl spaces, and under cabinets. Bring a notepad or your phone to record exact locations as you find them, and grab a roll of painter's tape to flag each spot temporarily so you can return to seal it.
A headlamp is better than a handheld flashlight for tight spaces because it keeps both hands free while you probe gaps and move debris.
Materials to have on hand
Once you locate the gaps, you'll want to seal the obvious ones immediately rather than scheduling a second trip. Stock up on these basic sealing materials before you begin:
- Steel wool : Stuff it into small gaps around pipes. Mice cannot chew through it.
- Expanding foam sealant : Fill larger voids and irregular openings in walls or the foundation.
- Hardware cloth (1/4-inch mesh) : Cover vents and larger openings mice could push through.
- Exterior-grade caulk : Seal gaps along the base of siding, around window frames, and where utilities enter the structure.
- Work gloves and a dust mask : Protect yourself in crawl spaces and attics where droppings may be present.
Step 1. Confirm mice activity and map the signs
Before you search for gaps, confirm that mice are the problem and get a sense of where they're traveling inside your home . Fresh droppings, gnaw marks, and grease trails along walls show you which rooms mice are using regularly. These clues point you directly toward entry points so you're not inspecting blind.
Read the signs mice leave behind
Mice travel the same routes every night, which makes their activity patterns predictable and easy to track . Walk through each room and look for these specific indicators :
- Droppings : Small, dark pellets roughly the size of a grain of rice, concentrated near food sources and along wall edges
- Grease marks : Dark smudges along baseboards and around holes where mice rub their oily fur
- Gnaw marks : Fresh chew damage on wood, plastic, or food packaging
- Nesting material : Shredded paper, insulation, or fabric tucked into corners
Create a simple activity map
Sketch a rough floor plan on paper and mark every location where you spot signs. This map guides your detailed inspection in the steps ahead and helps you prioritize where to look first.
Rooms with the most droppings are typically closest to where mice are entering, so start your detailed inspection there.
Step 2. Inspect indoors from ground level up
Now that you've mapped mouse activity, inspect the interior systematically starting from the floor up. This approach ensures you don't skip low gaps and pipe penetrations that mice favor. Begin in the rooms with the most droppings on your activity map, then move outward toward the rest of the home.
Check the kitchen and utility areas
Kitchens and laundry rooms are the most reliable indoor starting points when figuring out how to find entry points for mice . Get on your knees and shine your flashlight behind appliances and under the sink . Holes drilled for water supply lines and drain pipes are often several inches oversized, leaving gaps mice exploit every night without any resistance.

Check these specific locations in the kitchen and utility areas:
- Around water supply lines under the sink
- Where the dryer exhaust duct passes through the exterior wall
- Behind the refrigerator at the baseboard level
Move to walls, floors, and crawl spaces
After the kitchen, walk every baseboard in the affected rooms with your flashlight pressed close to the floor. Any gap wider than a quarter inch is a risk. Also check where pipes and wires enter the subfloor through any crawl space access hatch below your home.
A worn or missing pipe collar is a quick fix: push a steel cover plate over the pipe and fasten it flush against the wall.
Step 3. Inspect outside and follow the routes in
Walk the full exterior perimeter of your home in daylight with your flashlight in hand. Outdoor inspections are where most people searching for how to find entry points for mice discover the source of their problem, because gaps you can't see from inside are often obvious from the outside with the right angle and lighting.
Check the foundation and lower walls
Start at ground level and work slowly along the foundation on all four sides of the structure. Pay close attention to where the sill plate meets the concrete or brick, since this joint frequently develops cracks over time. Also check every utility penetration including gas lines, electrical conduit, hose bibs, and cable or internet lines entering the wall.

Look for these specific outdoor locations:
- Gaps around exterior pipe and conduit penetrations
- Cracks in the foundation wider than a quarter inch
- Damaged or missing weatherstripping on exterior doors and the garage door
Look up at roofline gaps and vents
After the foundation, step back and scan the roofline from the ground. Mice climb exterior walls easily using vines, downspouts, or overhanging tree branches. Check that all soffit vents and roof vents have intact mesh screens with no tears, rust holes, or loose edges where a mouse could push through.
If any tree branch hangs within three feet of your roofline, trim it back to remove one of the most reliable routes mice use to reach upper entry points.
Step 4. Confirm entry points and seal them for good
Now that you've walked the full perimeter and mapped every suspicious gap , it's time to verify each location before sealing. Rushing to seal gaps without confirmation means you might trap active mice inside your walls or miss the actual entry point entirely.
Verify each gap before you seal it
Use the flour or talcum powder test to confirm active mouse traffic at any gap you flagged during your inspection. Sprinkle a thin layer of powder on the floor directly in front of the opening, then check it after 24 hours. Fresh tracks through the powder confirm that specific gap is in active use and needs to be sealed first.
If you find tracks leading outward but not inward, mice may currently be outside, which is the ideal time to seal the gap permanently before they return.
Seal gaps in the right order
Work from the inside out to avoid trapping mice inside your walls. Close interior gaps first, then move to the exterior once you're confident no mice remain inside. Use the right material for each opening : steel wool packed tightly for small pipe gaps, hardware cloth fastened with screws for vents, and exterior caulk for cracks along the foundation and siding. Once every flagged spot on your activity map is sealed, you've completed the core process of how to find entry points for mice and cut off their access for good.
Quick Wrap-Up
Finding where mice get in is a process, not a single task. You now have a complete system for how to find entry points for mice : map the activity signs first, inspect indoors from the floor up, walk the full exterior perimeter, and confirm each gap before you seal it. Using the right material for each opening is what makes the seal last, so match steel wool, hardware cloth, or caulk to the specific type of gap you're closing.
Most homeowners can handle minor gaps on their own, but some infestations involve hidden entry points inside wall cavities, crawl spaces, or the attic that are difficult to access and easy to miss without professional tools. If your inspection turns up droppings in multiple rooms, ongoing noise in the walls, or gaps you can't safely reach, it's time to bring in a specialist. Contact Defender Termite & Pest Management for a professional rodent inspection and get the problem solved the right way.