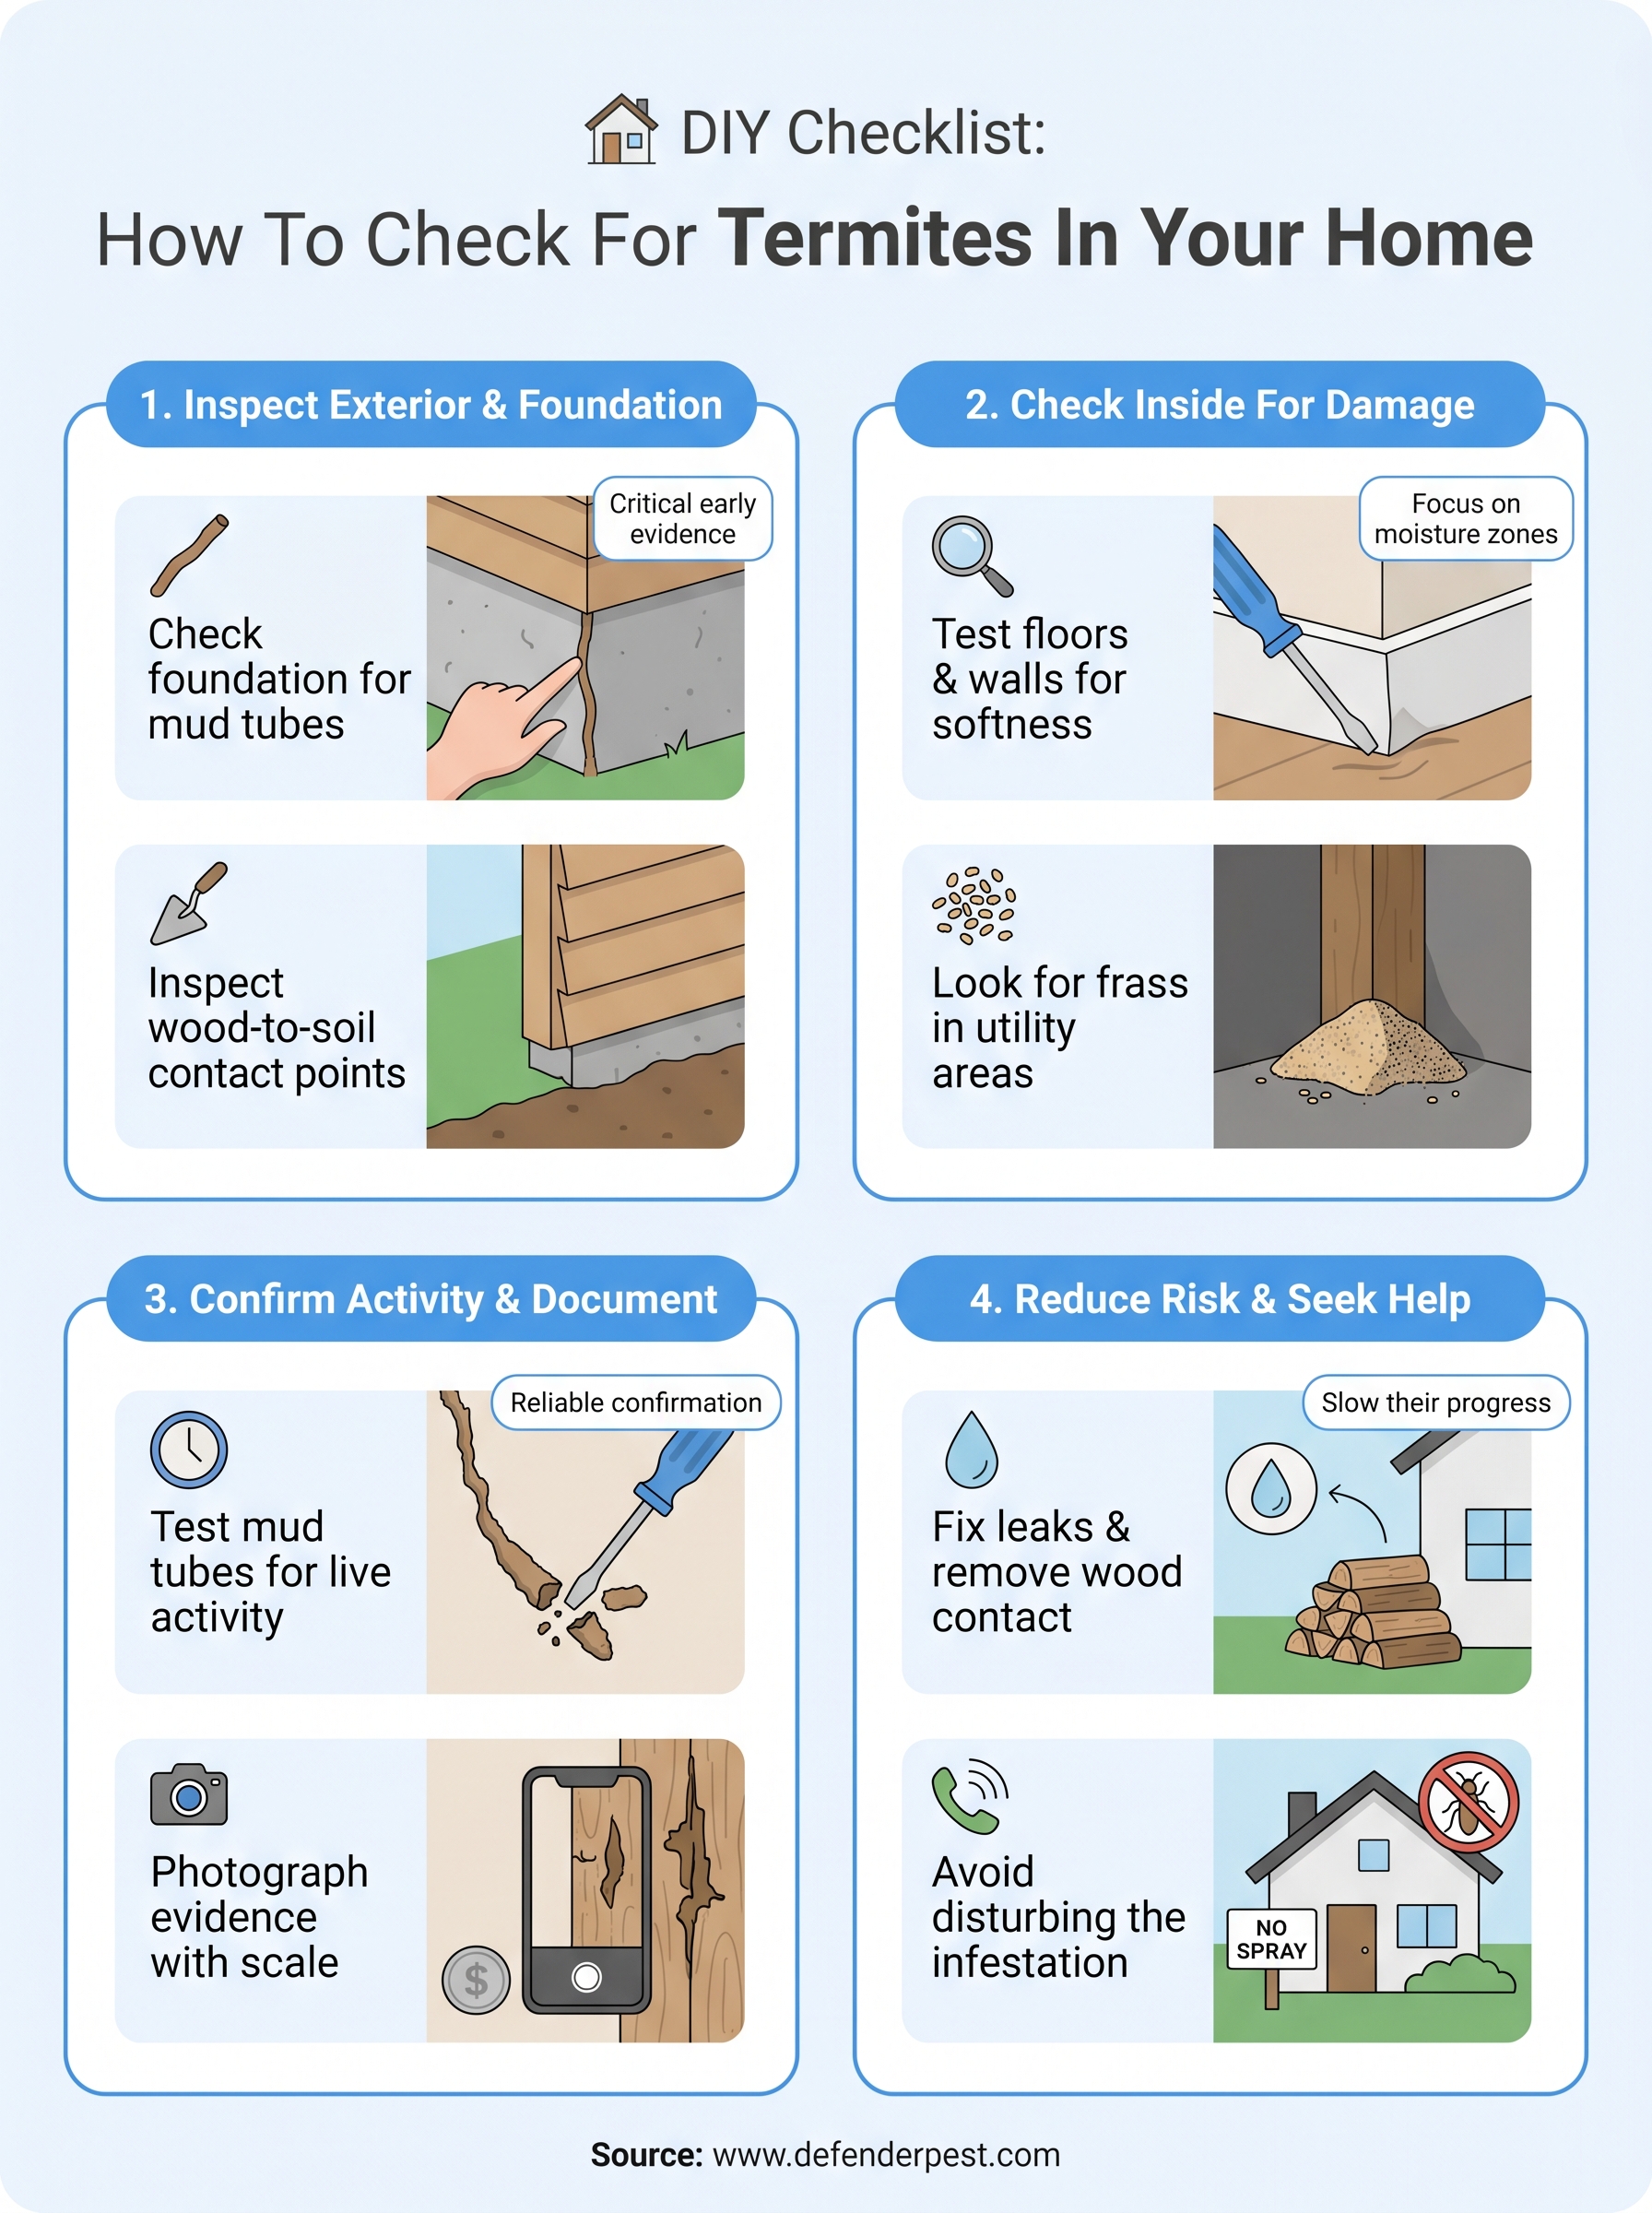
DIY Checklist: How To Check For Termites In Your Home
Termites cause billions of dollars in structural damage across the U.S. every year, and most homeowners don't notice them until the problem is serious. The good news? Learning how to check for termites yourself can help you catch an infestation early, before it turns into a costly repair project. You don't need special equipment or a background in pest control to spot the most common warning signs .
At Defender Termite & Pest Management, we've been inspecting and treating Sacramento-area homes for termites since 1999. Over those years, we've seen what early detection looks like, and what happens when it's missed. That hands-on experience is exactly what shaped this guide. Below, you'll find a room-by-room DIY checklist you can walk through on your own, along with clear descriptions of what to look for and when it's time to call a professional .
Before you start: tools, safety, and limits
Before you begin learning how to check for termites , take a few minutes to gather the right tools and set realistic expectations. A proper inspection requires you to get into tight, dim spaces like crawl spaces, attics, and behind utility panels. Going in unprepared wastes time and can mean you miss evidence sitting right in front of you.
What to gather before you inspect
You don't need professional-grade equipment to do a useful preliminary check. A handful of basic household tools will help you see, probe, and document what you find. Here's what to have on hand before you start:
- Flashlight or headlamp (bright enough to light up dark corners and wall voids)
- Flathead screwdriver for pressing into wood to check for softness or hollow areas
- Protective gloves to avoid direct contact with frass or debris
- Dust mask or respirator for attics and crawl spaces with poor air circulation
- Notepad or phone to record exact locations, take photos, and track your findings
- Knee pads if you plan to inspect a low-clearance crawl space
A flathead screwdriver does more work than almost any other tool here. Pressing it firmly against a wood surface tells you instantly whether the wood is solid or whether termites have been eating through it from the inside.
Safety precautions to take seriously
Crawl spaces and attics carry real physical risks , including sharp metal edges, weak flooring, poor air quality, and limited visibility. Before you enter any confined area, make sure someone else in the house knows where you are. Never put your full weight on structural members you haven't confirmed are sound, since termite-compromised wood can fail without warning.
If you spot standing water or a strong mold smell in a crawl space, exit before continuing. Those conditions point to moisture problems that attract termites in the first place, and they also create health hazards you need to address separately.
Know the limits of a DIY inspection
Your walkthrough gives you a starting point, not a final answer. Termites often travel deep inside wall cavities, beneath flooring, and through framing that you simply cannot reach without specialized equipment. A careful DIY check helps you gather visible evidence and narrow down problem areas , but it won't reveal every active colony or the true extent of structural damage. Treat your findings as information to bring to a professional, not as a complete picture on their own.
Step 1. Inspect the exterior and foundation
Start outside. The exterior and foundation of your home are where termites often first make contact with the structure. Subterranean termites travel up through soil and enter through cracks, gaps around pipes, and any wood that touches the ground. Walking a slow perimeter before you go inside gives you critical early evidence that's easy to miss if you jump straight to the interior rooms.
Check the foundation walls and wood contact points
Look closely at the base of your home's exterior walls and foundation for mud tubes. These are pencil-thin tunnels of packed soil that subterranean termites build to travel between the ground and their food source. Run your fingers along the foundation line and examine any spot where wood framing, siding, or trim makes direct contact with the soil. Any wood-to-soil contact is a high-risk entry point that termites exploit regularly.
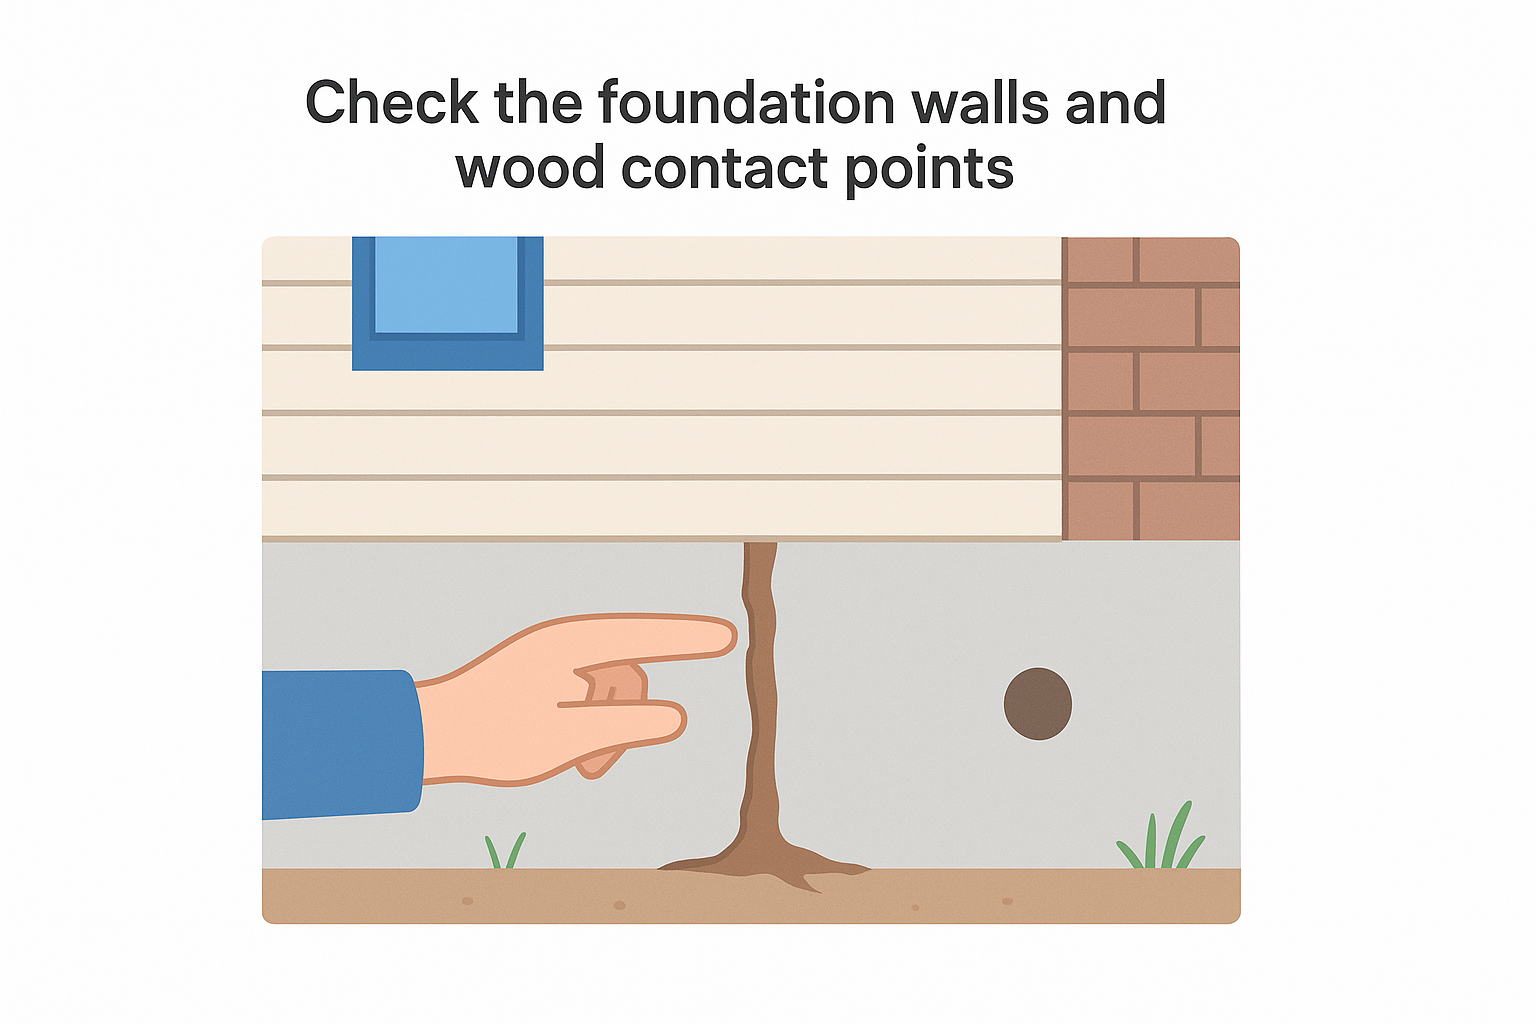
If you find even one mud tube on your foundation, treat it as confirmation of subterranean termite activity, not just a possibility worth watching.
Inspect wood structures, vents, and utility entry points
Check wood decking, fence posts, window frames, and fascia boards for soft spots or discolored patches. Press your screwdriver firmly into any suspicious area. Solid wood pushes back; termite-damaged wood gives way or crumbles with very little resistance. Also inspect crawl space vents and the spots where utility lines enter the foundation, since these gaps are common entry points that most homeowners overlook when learning how to check for termites on their own.
Step 2. Check inside for telltale damage
Once you finish the exterior walkthrough, move inside with your flashlight and screwdriver. Interior inspections are where most homeowners find their first clear evidence , because damage that termites do inside walls and floors eventually shows up in the living space. Work room by room rather than jumping around, since a systematic path helps you avoid missing areas that connect to ones you already covered.
Check floors, walls, and ceilings
Walk each room slowly and pay attention to how the floor feels underfoot. Soft or spongy spots in hardwood or laminate flooring are a strong indicator that subterranean termites have eaten through the wood from below. Look at baseboards closely, since termites hollow out wood from the inside and leave a thin outer shell that looks intact until you press on it. Bubbled or warped paint on walls is another warning sign, often caused by moisture that termites introduce as they tunnel through wood framing.
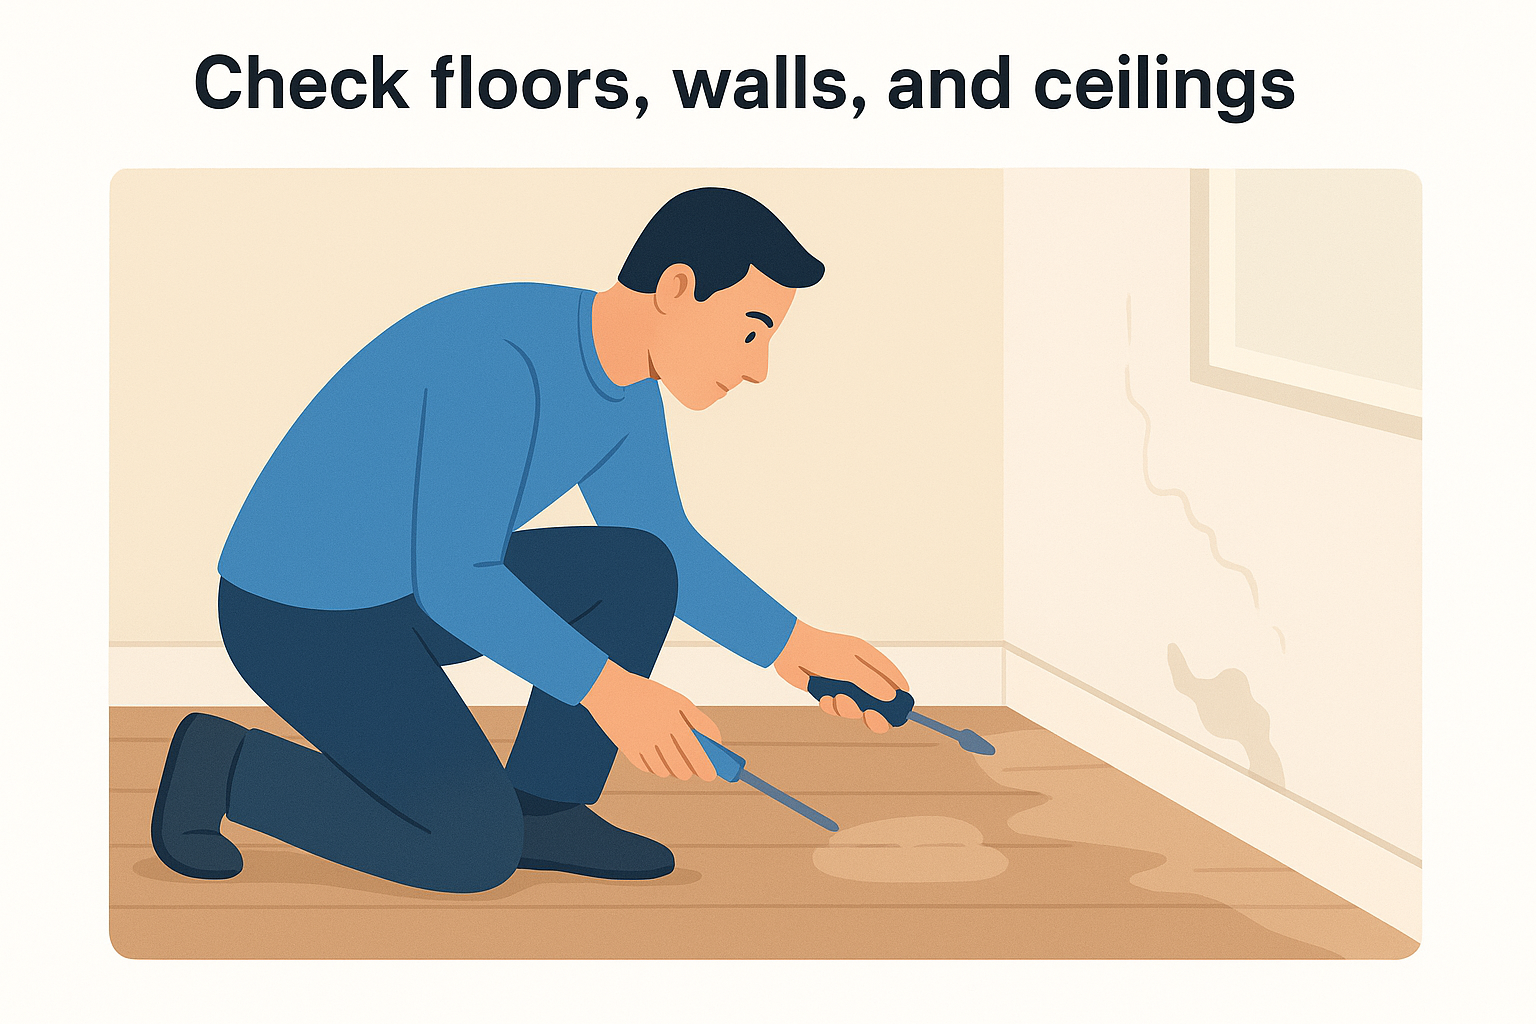
If a wall surface sounds hollow when you knock on it, move on to the screwdriver test. That hollow sound means the wood behind it may already be compromised.
Look in utility areas and hidden spaces
Kitchens, bathrooms, laundry rooms, and garages are high-risk zones because moisture collects near plumbing and appliances , and termites follow moisture. Open cabinet doors and inspect the wood framing at the base and along the back panels. Knowing how to check for termites inside means looking in the spaces you normally keep shut. Attic beams, crawl space joists, and garage framing all deserve the same slow, methodical screwdriver test you applied during the exterior inspection.
Step 3. Confirm activity and document it
Finding physical damage or mud tubes tells you termites have been present, but it doesn't confirm they're still active. Confirming live activity before you contact a professional makes your report more useful and helps the inspector focus on the right areas. This step works as a quality check on everything you found during your walkthroughs when learning how to check for termites on your own.
Test for live activity
One practical way to test for live subterranean termites is to carefully break open a small section of a mud tube with your screwdriver and check back in 24 to 48 hours. If termites have repaired the break, the colony is still active in that location. For drywood termites, check for fresh frass accumulation near baseboards and windowsills. Frass looks like small, pellet-shaped droppings similar to sawdust or coarse grains of sand. Look for these specific signs of active feeding:
- Repaired mud tubes within 48 hours of breaking them
- Fresh frass appearing in the same spot over two consecutive days
- Winged termites (swarmers) seen near windows or light fixtures indoors
A repaired mud tube is one of the most reliable confirmations of an active subterranean colony you can get without professional equipment.
Document what you find
Photograph every suspicious area before you probe it further, and place a coin or ruler next to the damage so the scale is clear in each photo. Organized documentation helps a pest professional assess severity before arriving on site. Record your findings using this simple log format:
| Location | What you found | Photo taken | Date |
|---|---|---|---|
| Crawl space north beam | Mud tube, soft wood | Yes | [date] |
| Kitchen cabinet base | Frass pile | Yes | [date] |
| Garage south wall | Hollow sound, paint bubbling | Yes | [date] |
Step 4. Reduce risk while you wait for help
Once you finish learning how to check for termites and document your findings, you have one more job before the professional arrives: reduce the conditions that help termites thrive . You won't eliminate the colony on your own, but you can slow their progress and prevent new entry points from forming while you wait for a scheduled inspection.
Remove moisture and wood-to-soil contact
Termites depend on moisture to survive, so fixing obvious water sources around your home cuts off one of their primary needs. Check for leaking hose bibs, clogged gutters, and downspouts that dump water against the foundation rather than directing it away from the house. Inside, run a bathroom exhaust fan during showers and check under sinks for slow drips you may have ignored.
Pulling firewood, lumber scraps, or dense mulch away from your foundation is one of the fastest risk-reduction steps you can take today.
At the exterior, move any stored wood, cardboard boxes, or dense mulch at least 18 inches away from the foundation . These materials hold moisture and give termites a ready food source right next to your home's structure.
Avoid disturbing the infestation
Resist the urge to spray store-bought pesticide on mud tubes or damaged wood before a professional arrives. Disturbing the colony at this stage often causes termites to scatter deeper into the structure, which makes it harder to treat the full infestation effectively. Leave the evidence intact so the inspector can confirm the species, map activity zones, and recommend the right treatment approach for your specific situation.
Next steps if you suspect termites
Now that you know how to check for termites room by room, the single most important next step is getting a professional inspection scheduled before the damage spreads further. Your documentation, photos, and activity notes give a licensed inspector a clear head start on identifying the species and mapping the extent of the infestation.
Termite colonies grow quietly for months or years before structural damage becomes visible, so waiting to confirm your suspicions on your own carries real financial risk. A certified inspector uses moisture meters, probes, and direct experience to reach areas your DIY walkthrough simply cannot access. The sooner you book a professional assessment, the more treatment options remain available to you.
If you found mud tubes, hollow wood, frass, or any other warning signs during your walkthrough, contact Defender Termite & Pest Management today to schedule an inspection with an experienced local team.