How To Prepare For A Termite Inspection: At-Home Checklist
If you've scheduled a termite inspection, whether for a real estate transaction, annual maintenance, or because something caught your eye, you're already making a smart move. But knowing how to prepare for a termite inspection ahead of time can make the difference between a thorough evaluation and one that misses critical areas. A licensed inspector needs clear physical access to your home's most vulnerable spots, and a little prep work on your end goes a long way.
At Defender Termite & Pest Management, we've been performing termite inspections across the Greater Sacramento area since 1999. Over that time, our inspectors have walked through thousands of homes, and we can tell you that the most productive inspections happen when homeowners take a few simple steps beforehand. Since we also handle termite treatment and structural wood repair , we see firsthand how early detection prevents costly damage down the road.
This checklist breaks down exactly what to do before your inspector arrives. You'll learn which areas to clear, what to move, and why each step matters, so nothing gets overlooked and your inspection covers every square inch it should.
What a termite inspector needs to see
A termite inspector follows a systematic route through your home, checking every area where wood meets moisture or soil. Before you can fully understand how to prepare for a termite inspection, you need to know what the inspector is actually looking for and where they physically need to go. Blocked access to any of these zones can produce an incomplete report , which means active damage goes undetected until it becomes a much bigger problem.
Interior access points
Your inspector needs to physically enter and examine several interior zones that most homeowners rarely visit. These spots are exactly where termite activity tends to start and where early evidence appears first.
- Attic : The inspector checks roof framing, rafters, and any wood in contact with insulation or the roof deck.
- Crawlspace : One of the highest-risk areas. The inspector looks for mud tubes, damaged wood, and moisture buildup along the subfloor and foundation walls.
- Garage : Wall studs, framing around the garage door, and any stored wood or debris get examined closely.
- Bathrooms and kitchens : The inspector checks under sinks and around plumbing penetrations for moisture damage and wood deterioration.
- Utility closets : Areas around water heaters and HVAC connections can attract termites due to warmth and occasional moisture.
If your crawlspace hatch or attic access is blocked or physically too difficult to enter, your inspector may not be able to complete the evaluation, which can delay the final report.
Exterior and structural zones
Outside the home, foundation walls, exterior wood siding, window frames, and fencing all require direct visual access. The inspector also looks closely at where wood structures contact the soil , including deck posts, stair stringers, and wood mulch beds along the foundation, since ground contact is the primary entry point for subterranean termites in Sacramento-area homes.
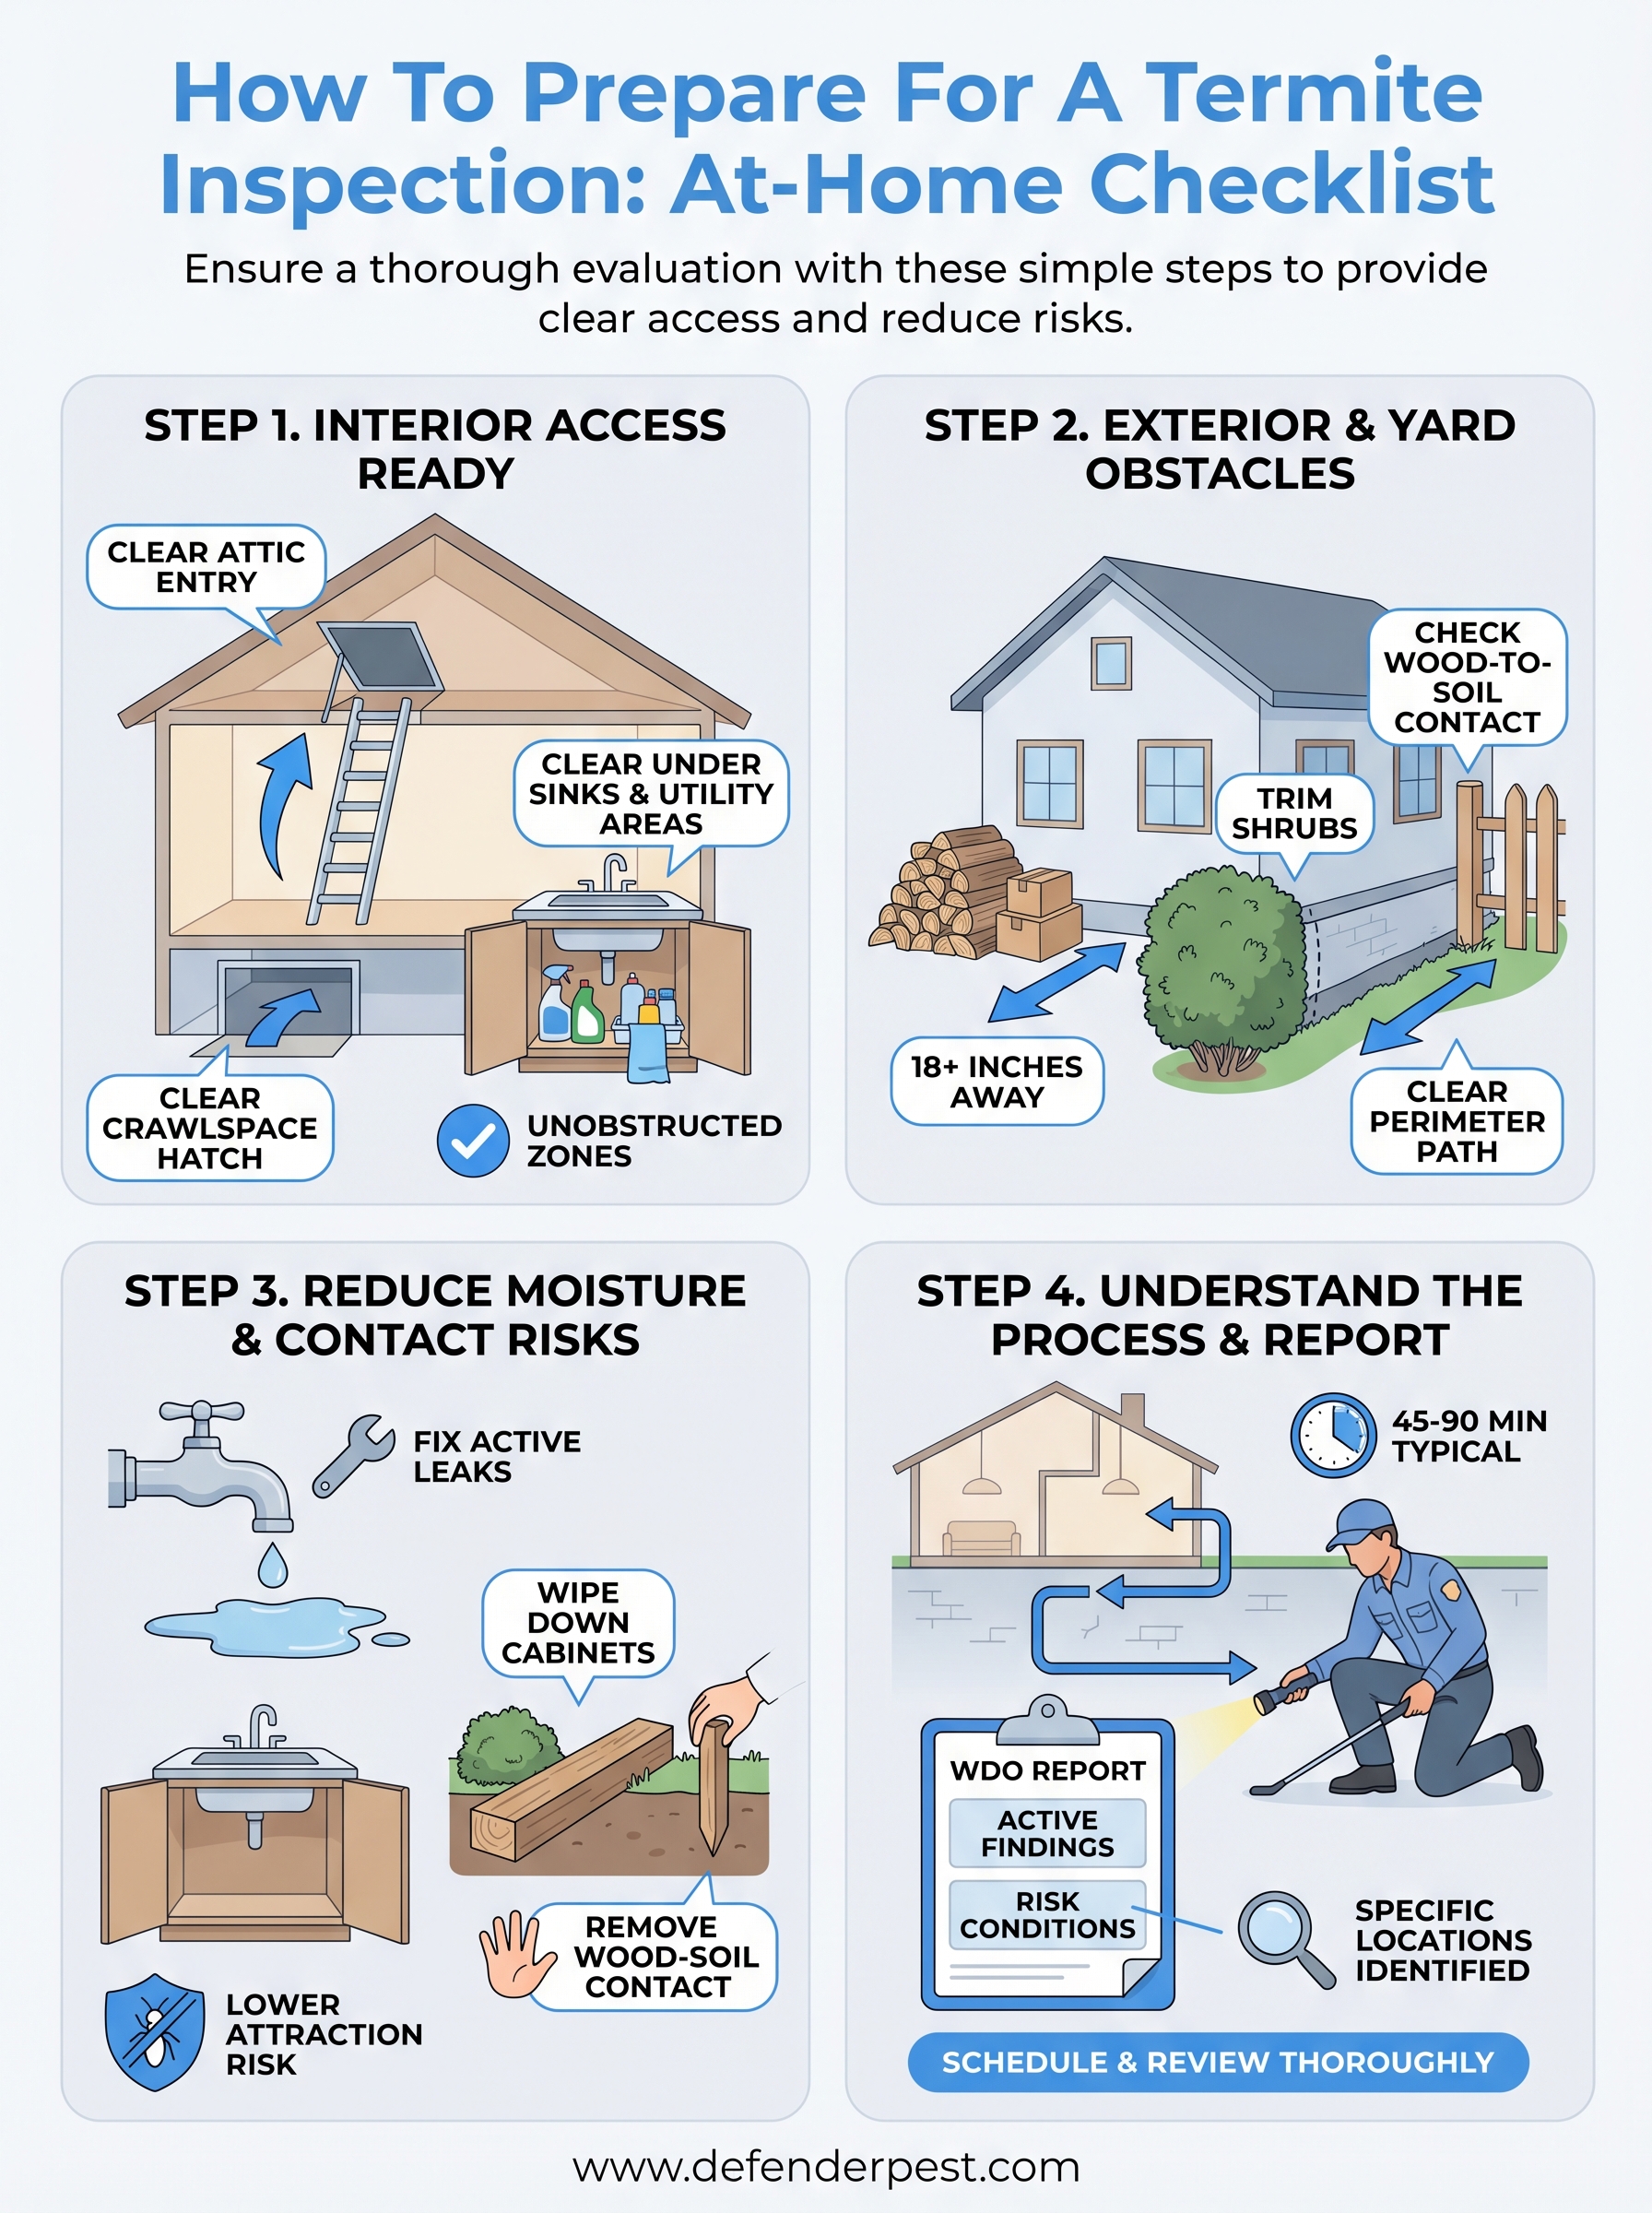
Step 1. Get the inside access ready
Interior prep is the most time-sensitive part of knowing how to prepare for a termite inspection . Your inspector needs unobstructed physical access to attic hatches, crawlspace entry points, under-sink cabinets, and utility closets before they can start their evaluation. Plan to spend about 20 to 30 minutes clearing these zones the day before your appointment.
Open up attic and crawlspace entry points
Check that your attic hatch opens freely and that nothing is stacked underneath it. If your attic hatch is in a closet, remove any clothing or boxes that block the ladder or pull-down stairs. For your crawlspace, clear anything stored directly in front of the access panel, since inspectors need to physically enter that space.
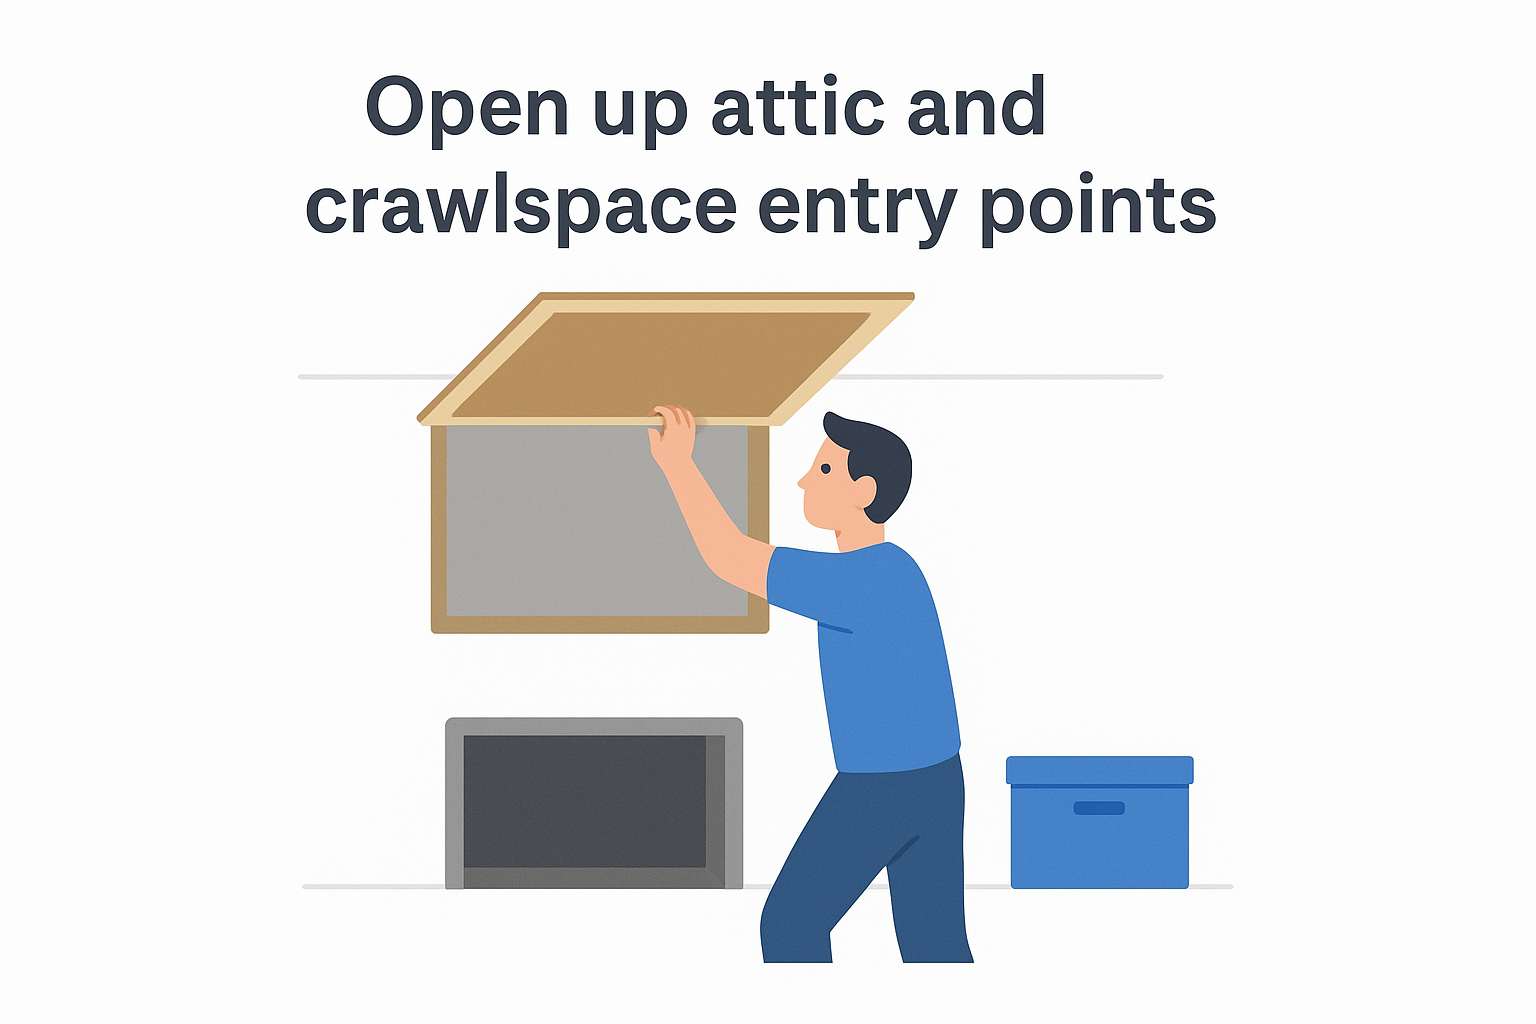
If your crawlspace entry is less than 18 inches wide or blocked by built-in storage, flag this for your inspector before the visit so they can plan accordingly.
Clear under sinks and utility areas
Pull out cleaning supplies, trash cans, and any stored items from under bathroom and kitchen sinks. Your inspector needs a direct line of sight to the cabinet walls and the wood framing around plumbing penetrations . Do the same for your water heater closet and any HVAC access panels, removing anything stored in front of them.
Step 2. Clear exterior and yard obstacles
Exterior prep is just as important as interior prep when you think about how to prepare for a termite inspection . Your inspector needs a clear path along the entire foundation perimeter , which means removing anything that blocks direct access to the base of your home's exterior walls. Plan to walk the full perimeter yourself first so you know exactly what needs to move.
Move yard debris and stored materials away from the foundation
Pull firewood stacks, lumber piles, and cardboard boxes at least 18 inches away from the foundation wall. These materials trap moisture and give termites a direct bridge into your home's structure. The same applies to potted plants, garden bags, and outdoor furniture sitting flush against the siding.
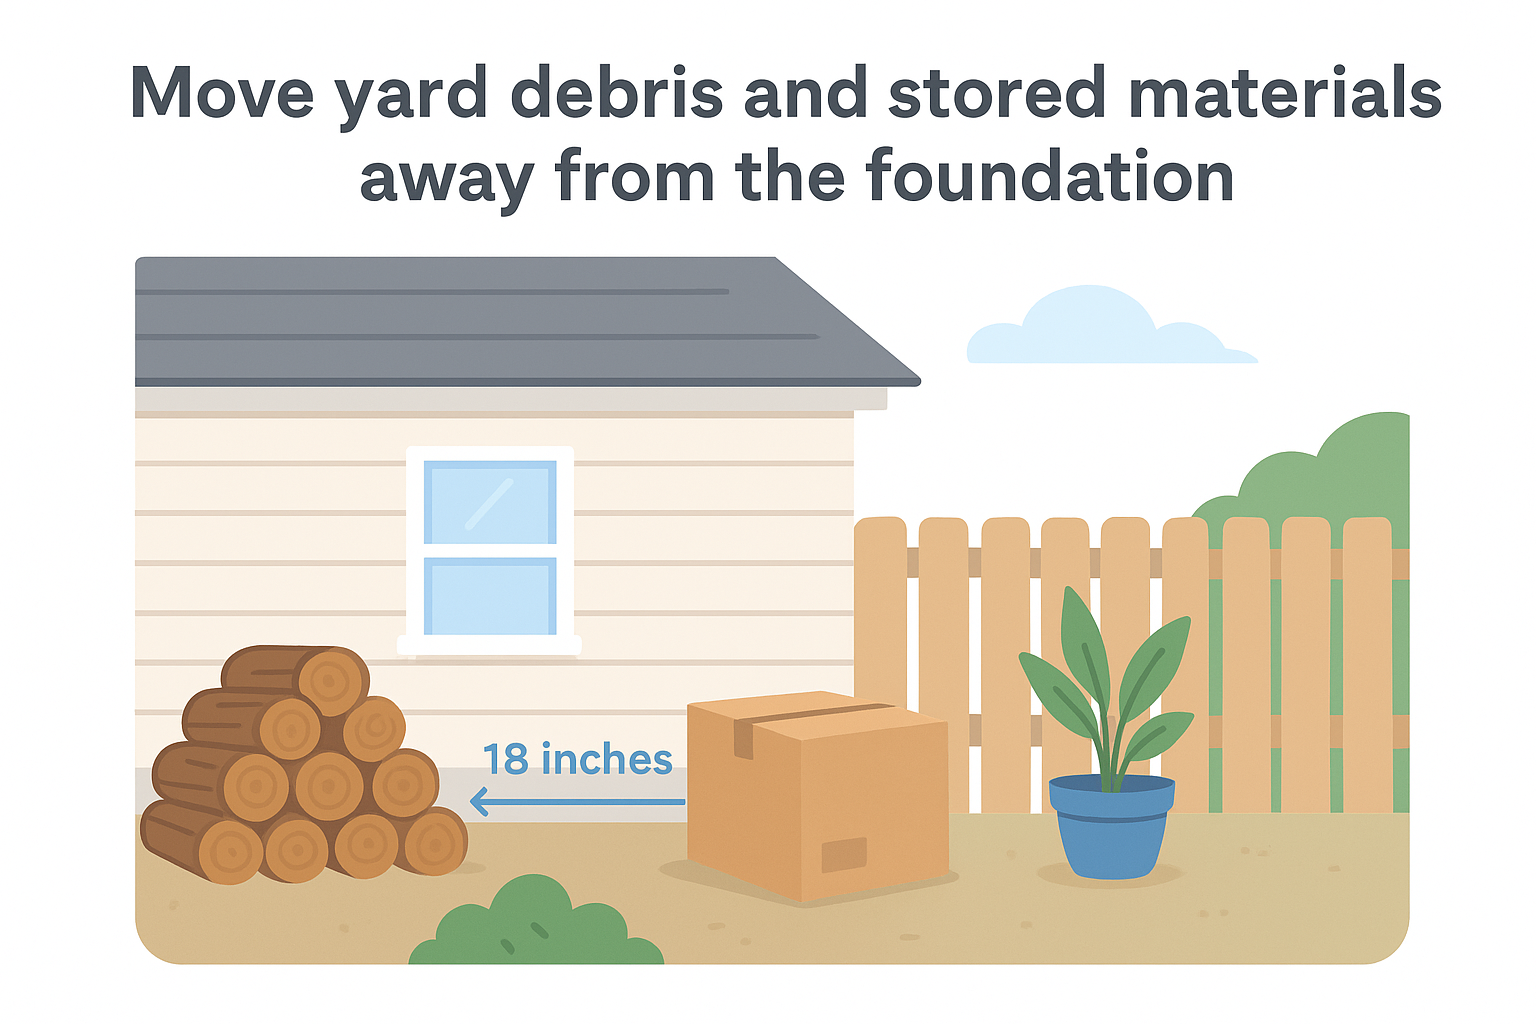
Firewood stored directly against the foundation is one of the most common conditions our inspectors flag during Sacramento-area inspections.
Here is a quick checklist to work through before your inspector arrives:
- Move firewood at least 18 inches from the exterior walls
- Pull back any mulch piled against the foundation
- Trim dense shrubs so the inspector can physically reach the wall
- Clear leaves and debris from window wells
Check fencing and deck structures
Make sure your deck and fence boards are visible and accessible. Your inspector checks where wood posts meet soil , so avoid leaving garden equipment or tarps draped over those contact points before the visit.
Step 3. Reduce moisture and wood contact risks
Knowing how to prepare for a termite inspection also means addressing conditions that attract termites in the first place. Moisture and wood-to-soil contact are the two most common factors that make a home vulnerable to subterranean termites, so dealing with them before your inspector arrives gives you a more accurate picture of your home's actual risk level.
Fix active leaks and drips before the inspector arrives
Walk through your home and check for dripping faucets, slow drains, or water stains under sinks and around toilet bases. Active leaks create soft, wet wood that termites target directly. Tighten any loose fittings you can reach and wipe down cabinet interiors so your inspector can clearly see the condition of the wood framing and cabinet floor .
Here are the spots to check before the visit:
- Under bathroom and kitchen sinks
- Around the base of toilets
- Near the water heater connection
- Along crawlspace walls and subfloor
A damp cabinet floor under a kitchen sink is one of the first things our inspectors check, since it often points to long-term wood deterioration behind the cabinet walls.
Separate wood from soil contact
Check your yard for landscape timbers, wood stakes, and scrap lumber resting directly on the ground near your foundation. Remove them before the inspection. Wood-to-soil contact within a few feet of your home gives termites a direct path from the ground into your structure.
Step 4. Know what happens during the inspection
Understanding the inspection process itself is the final piece of knowing how to prepare for a termite inspection . When your inspector arrives, they follow a structured sequence that typically takes 45 minutes to 90 minutes depending on the size and layout of your home. You do not need to guide them, but staying available to answer questions about known leaks, previous treatments, or areas of concern helps them work more efficiently.
How the inspector moves through your home
Your inspector starts at the exterior foundation perimeter , then moves inside to the crawlspace, attic, garage, and living areas. They use a probe and flashlight to tap and examine wood surfaces, checking for hollow sounds, mud tubes, frass, and soft spots that signal active or previous termite activity. Some inspectors also use moisture meters to flag damp wood that may not show visible damage yet.
Inspectors in California are required to provide a written Wood Destroying Pest and Organism (WDO) report, which breaks down active infestations, previous damage, and conditions that increase your risk.
What you receive after the walk-through
After the inspection, your inspector delivers a formal written report that separates findings into active conditions and conditions likely to lead to infestation. Each finding includes the specific location so you know exactly where any work needs to happen.
After the inspection, what to do next
Once you receive your written WDO report , read through each finding carefully. The report separates active infestations from conditions that increase risk , so you know which items need immediate treatment and which ones you can monitor over time. If anything in the report is unclear, call your inspector and ask for clarification before moving forward with any work.
Knowing how to prepare for a termite inspection puts you in a stronger position when you review those results, because you already addressed moisture issues and access obstacles ahead of time. That means the findings in your report reflect your home's actual condition , not gaps caused by blocked areas. If the report identifies active termite damage or structural wood deterioration, acting quickly limits how far the problem spreads. Schedule a termite inspection with Defender Termite & Pest Management to get a thorough evaluation and a clear path forward.