Raccoon Removal: How To Get Raccoons Out Of The Attic
Scratching, thumping, and chittering coming from above your ceiling at 3 a.m., that's the unmistakable sign of a raccoon that's made your attic its new home. If you're trying to figure out how to get raccoons out of the attic , you're dealing with one of the most stubborn and resourceful animals that invades Sacramento-area homes. Raccoons don't just squat in your insulation for a night or two. They tear up ductwork, soil everything they touch, and can cause serious structural damage if left unchecked.
The good news is that most raccoon situations can be resolved with the right approach, humane deterrents, proper exclusion techniques , and a clear plan. But it helps to know what actually works versus what wastes your time and money. At Defender Termite & Pest Management, we've handled wildlife and pest problems across Greater Sacramento since 1999, and we've seen firsthand the damage raccoons leave behind in attics, crawl spaces, and rooflines.
This guide walks you through practical, step-by-step methods to remove raccoons from your attic and seal up entry points so they don't come back. We'll cover scent-based repellents, sound deterrents, one-way exclusion doors, and when it's time to call in professional help instead of going it alone.
Before you start: safety, laws, and signs
Before you attempt any hands-on work to figure out how to get raccoons out of the attic, take a few minutes to understand what you're actually dealing with. Raccoons are not passive animals when they feel cornered, and attics create exactly that scenario. Beyond the physical danger, there are legal and sanitation factors that can turn a well-intentioned DIY removal into a serious problem if you skip this step.
Know the risks before going up there
Raccoon attics are genuinely hazardous environments. A raccoon that feels threatened will scratch and bite, and their bites can transmit rabies and Baylisascaris procyonis , a raccoon roundworm that is dangerous to humans and pets. Never handle a raccoon with bare hands. If you need to enter the attic to inspect it, wear an N95 respirator, gloves, and protective eyewear because dried raccoon feces can release airborne roundworm eggs when disturbed.
If you find a raccoon that appears disoriented, acts aggressive without provocation, or moves toward you without hesitation, do not attempt removal yourself. Contact your local animal control immediately.
You should also watch for young kits , since raccoons give birth from January through June in Northern California. A mother raccoon defending her young is significantly more aggressive, and removing her before her kits can move on their own creates a separate problem you'll have to solve.
Understand California's rules on raccoon removal
California classifies raccoons as non-game mammals under the California Department of Fish and Wildlife, which means you can legally take steps to exclude or deter them from your property without a special permit. However, trapping and relocating raccoons to a different location is not straightforward. Moving a raccoon to a new area can be restricted, and releasing it on public land without authorization is illegal under state law.
Your safest legal path is exclusion, which means sealing entry points so raccoons leave on their own and cannot return. If trapping becomes necessary, check your local county regulations first, since Sacramento-area rules can layer additional requirements on top of the state baseline.
Spot the signs of raccoons in your attic
Confirming that raccoons are your actual problem saves you wasted effort and money. Heavy thumping or rolling sounds at night point to raccoons rather than rats or squirrels, which move faster and produce lighter, skittering noises. You may also notice torn soffit material, displaced roof tiles, or a strong ammonia-like odor rising from the attic space, which comes from their urine and designated latrine areas.
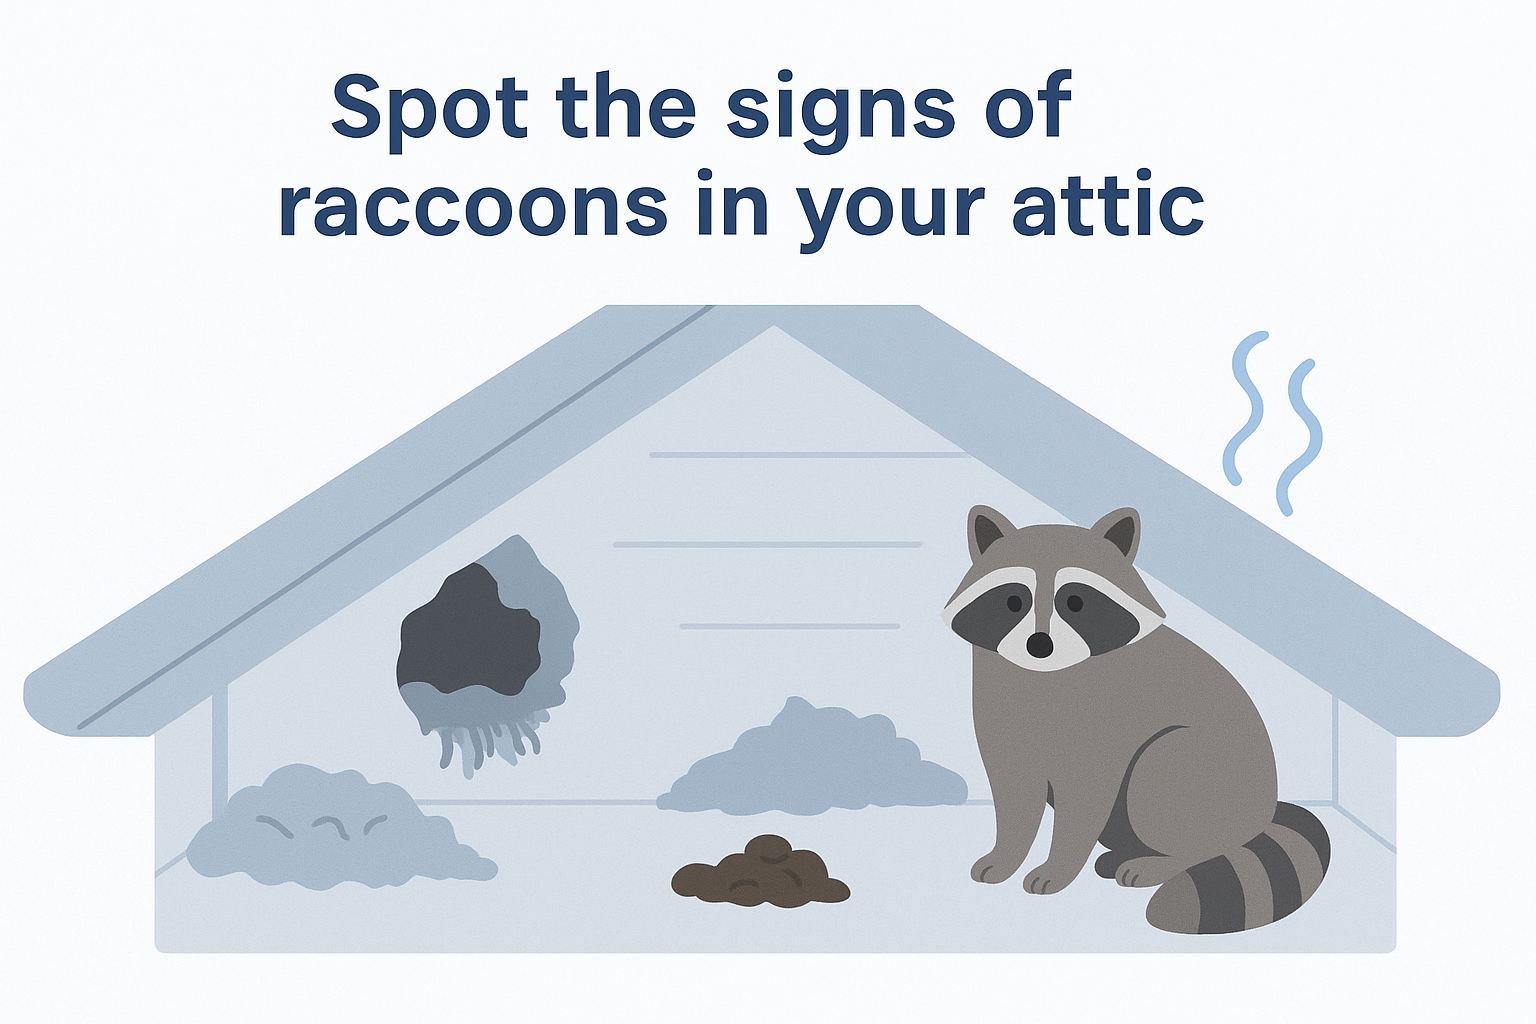
Check your attic insulation for matted-down sections or dark staining, both common signs of a raccoon latrine. Raccoons tend to return to the same corner repeatedly, leaving visible fecal piles that are tubular and roughly the size of a small dog's droppings. Spotting these signs early helps you plan your removal approach before the damage gets worse.
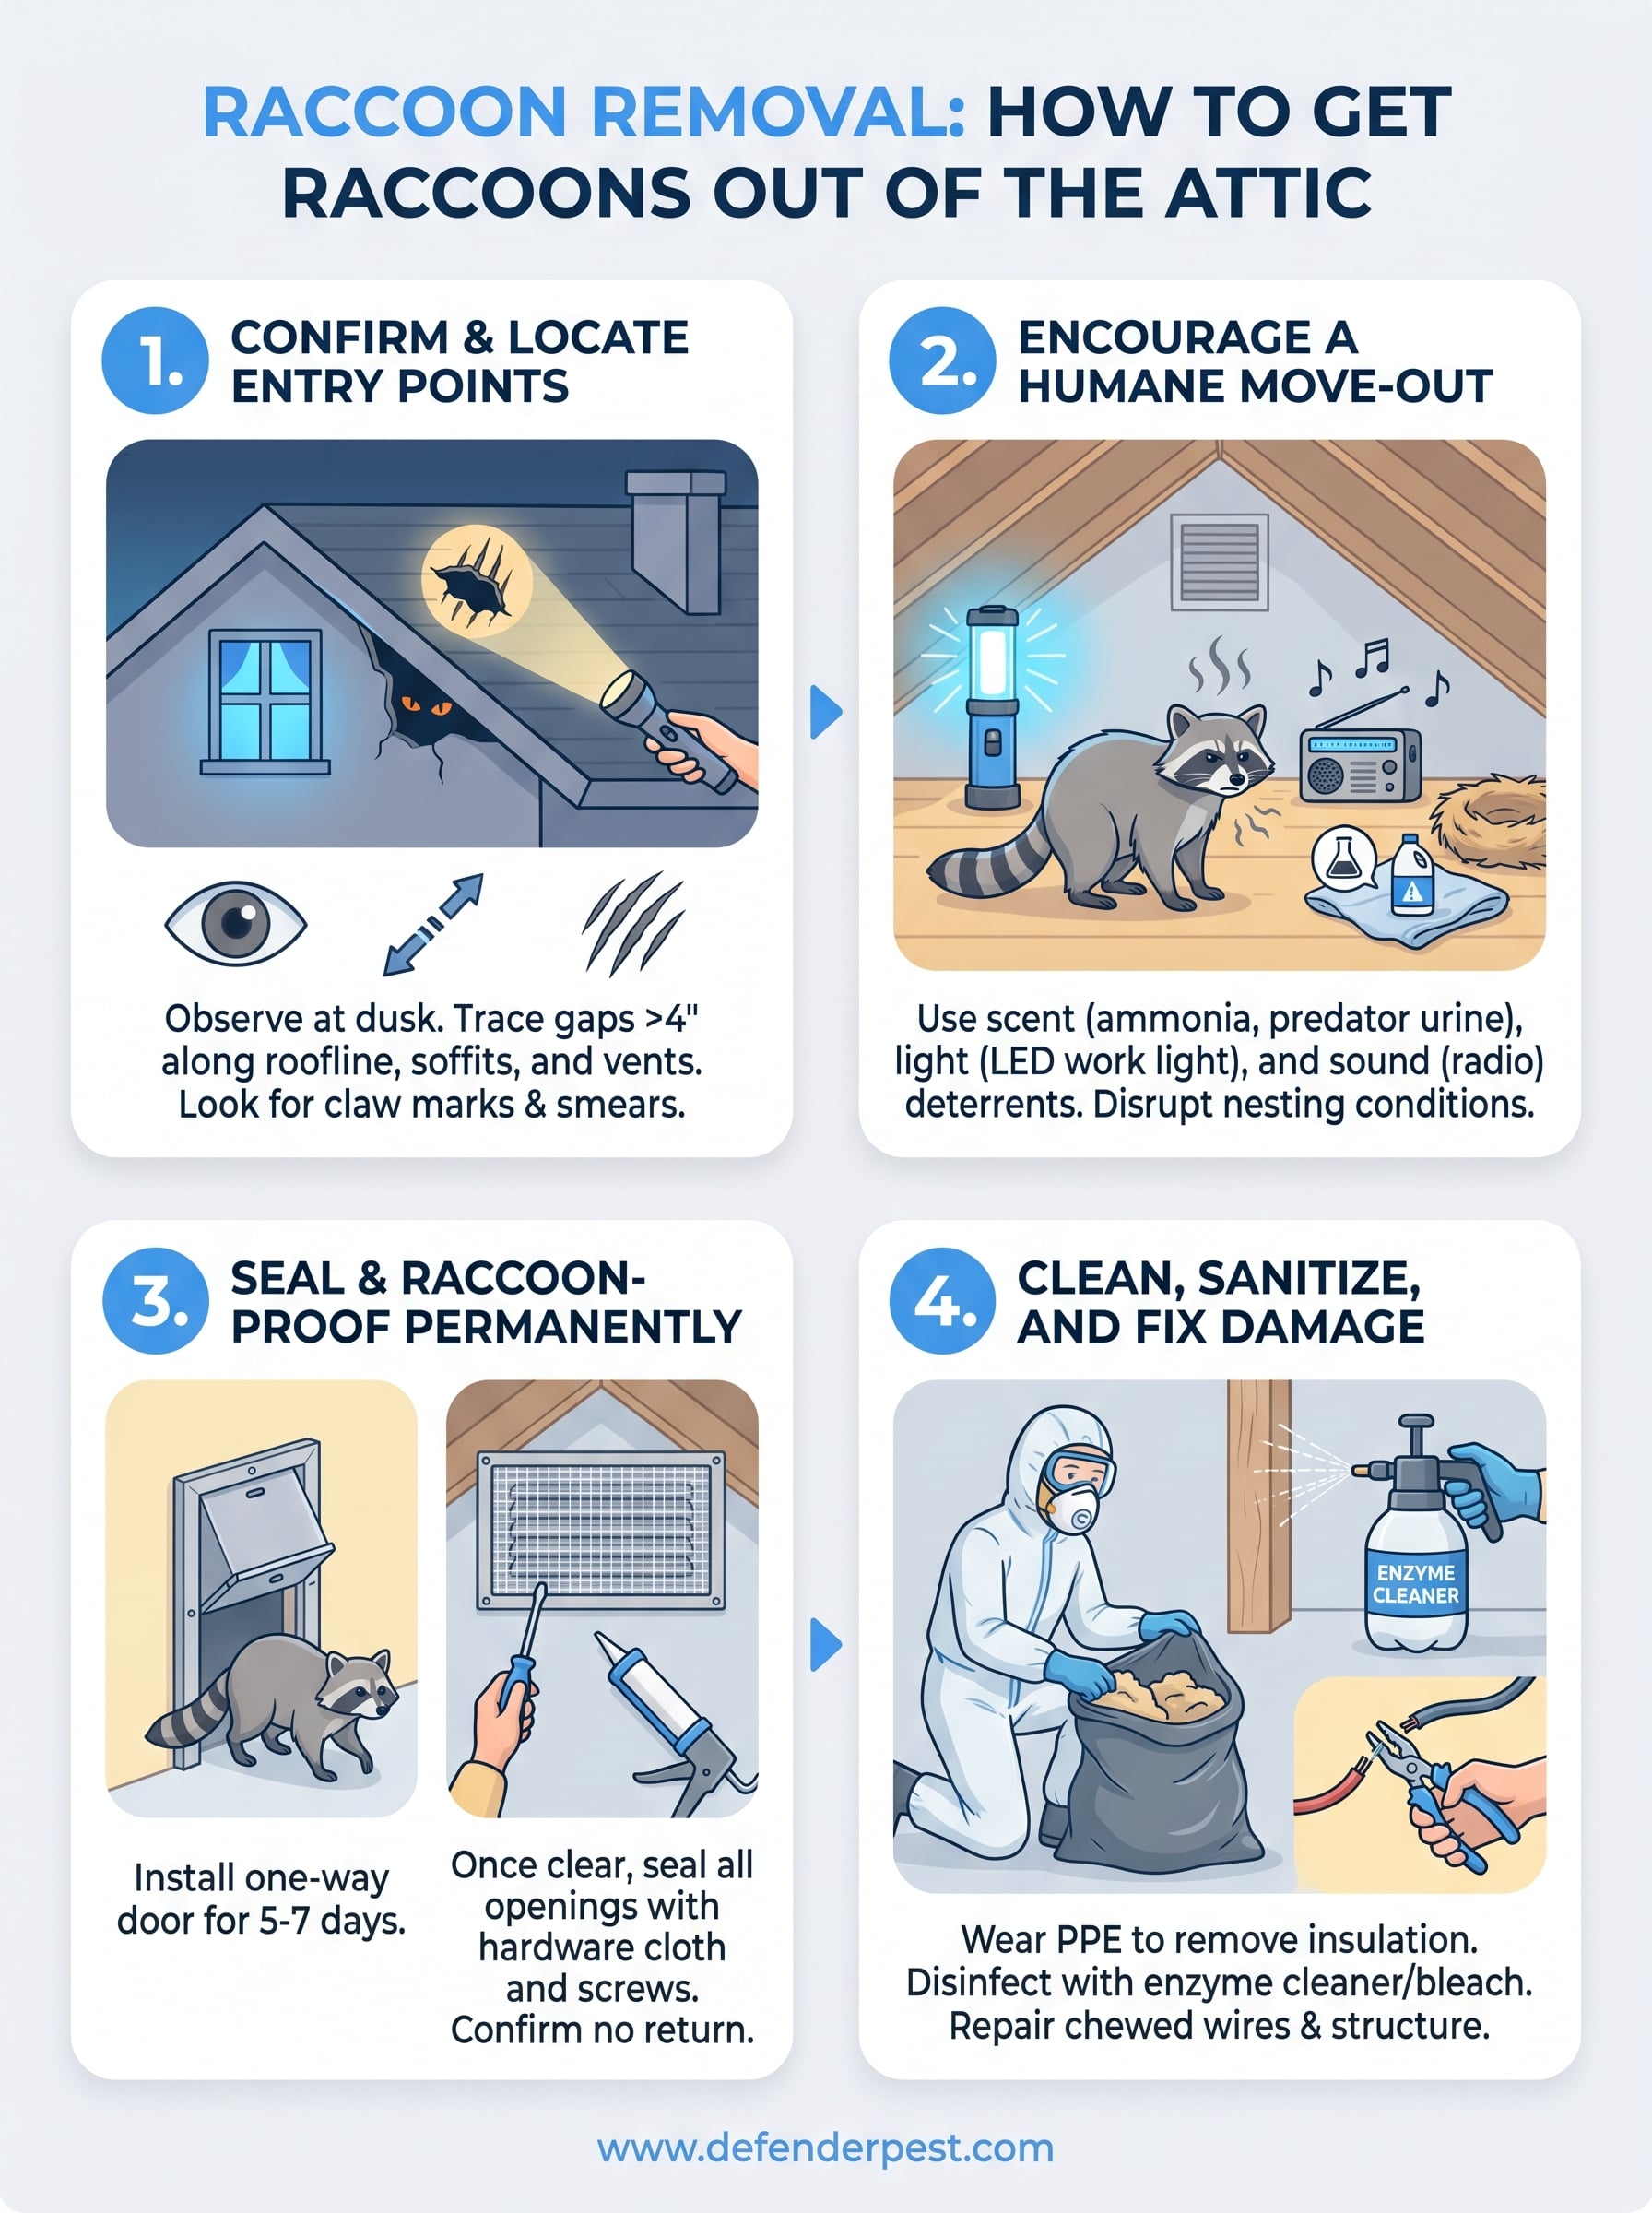
Step 1. Confirm raccoons and locate entry points
Before you seal anything or set up deterrents, you need to confirm that raccoons are your problem and find exactly where they're getting in. Skipping this step means you could seal the wrong spot and trap an animal inside, or waste time targeting an opening raccoons aren't even using. Knowing how to get raccoons out of the attic starts with solid reconnaissance before any physical work begins.
Do a nighttime observation first
Raccoons are nocturnal , so the best time to confirm their activity is right at dusk. Position yourself outside your home about 30 minutes before dark and watch your roofline. You're looking for movement near soffits, fascia boards, gable vents, or where utility lines meet the exterior wall . A flashlight scan along the roofline after full dark can reveal worn edges or smear marks from repeated raccoon contact, which appear as dark, oily streaks around a gap or opening.
Write down the exact locations where you observe activity, since you'll need this list when you start sealing in Step 3.
Trace every entry point from the outside
Walk your entire roofline and look for gaps wider than four inches , which is roughly the minimum space a raccoon needs to push through. Pay close attention to areas where materials meet at angles, including roof-to-fascia joints, chimney flashing, and attic vents with damaged screens . Raccoons tend to return to the same openings repeatedly, so you'll typically find claw marks or compressed insulation visible through a gap.
From inside the attic, use a flashlight during daylight hours to look for pinhole light leaks around the perimeter. Mark each spot with painter's tape so you have a clear map before you move to exclusion. A thorough entry point audit typically turns up two to four access points per home, and missing even one guarantees the raccoons come back once you've finished all your other work.
Step 2. Encourage a humane move-out
Once you've confirmed the entry points, your next goal is to make the attic as uncomfortable as possible for the raccoon so it chooses to leave on its own. This approach is the core of how to get raccoons out of the attic without trapping or handling the animal directly. You're not forcing anything; you're changing the environment so the raccoon decides your attic is no longer worth the trouble.
Use scent-based repellents
Raccoons have a strong sense of smell , which you can use to your advantage. Several scents are known to irritate them and signal danger, including ammonia, predator urine, and hot pepper. Soak rags in ammonia or diluted coyote urine (available at outdoor sporting goods stores) and place them near the raccoon's nesting area. Refresh the rags every 48 hours because the scent fades quickly and loses its effect.
Here are the most effective scent repellents to use in an attic space:
- Ammonia-soaked rags placed near the nest or latrine area
- Cayenne pepper sprinkled along the perimeter of the attic floor
- Commercial predator urine (coyote or fox) applied to rags near the entry point
- Mothballs in small mesh bags hung near nesting material (keep these out of reach of children and pets)
Do not spray liquid repellents directly onto insulation, since saturating insulation creates a moisture and mold problem you'll have to address separately.
Add light and sound deterrents
Raccoons prefer dark, quiet spaces when they nest, so disrupting those conditions accelerates their departure. Place a battery-powered LED work light in the attic and leave it on continuously for several days. Pairing light with a battery-operated radio set to a talk station adds human noise, which raccoons associate with risk.
Position the light and radio as close to the nesting area as possible to maximize the disruption. Most raccoons without young kits will abandon a space within three to five days under these combined conditions.
Step 3. Seal and raccoon-proof the attic
Once the raccoon has stopped using the attic for several consecutive nights, you're ready to move into the sealing phase. This step is critical to how to get raccoons out of the attic for good, because deterrents alone don't work long-term if the entry points stay open . A raccoon that leaves in late spring can return in fall when temperatures drop, so permanent exclusion is what actually ends the problem .
Install a one-way exclusion door first
Before you seal anything permanently, install a one-way exclusion door over the primary entry point. This device lets the raccoon push outward but blocks re-entry, which confirms the animal has fully vacated before you close up for good. Leave it in place for five to seven days and check for activity each morning by placing a small strip of masking tape across the door frame. If the tape breaks, the raccoon is still using the opening.
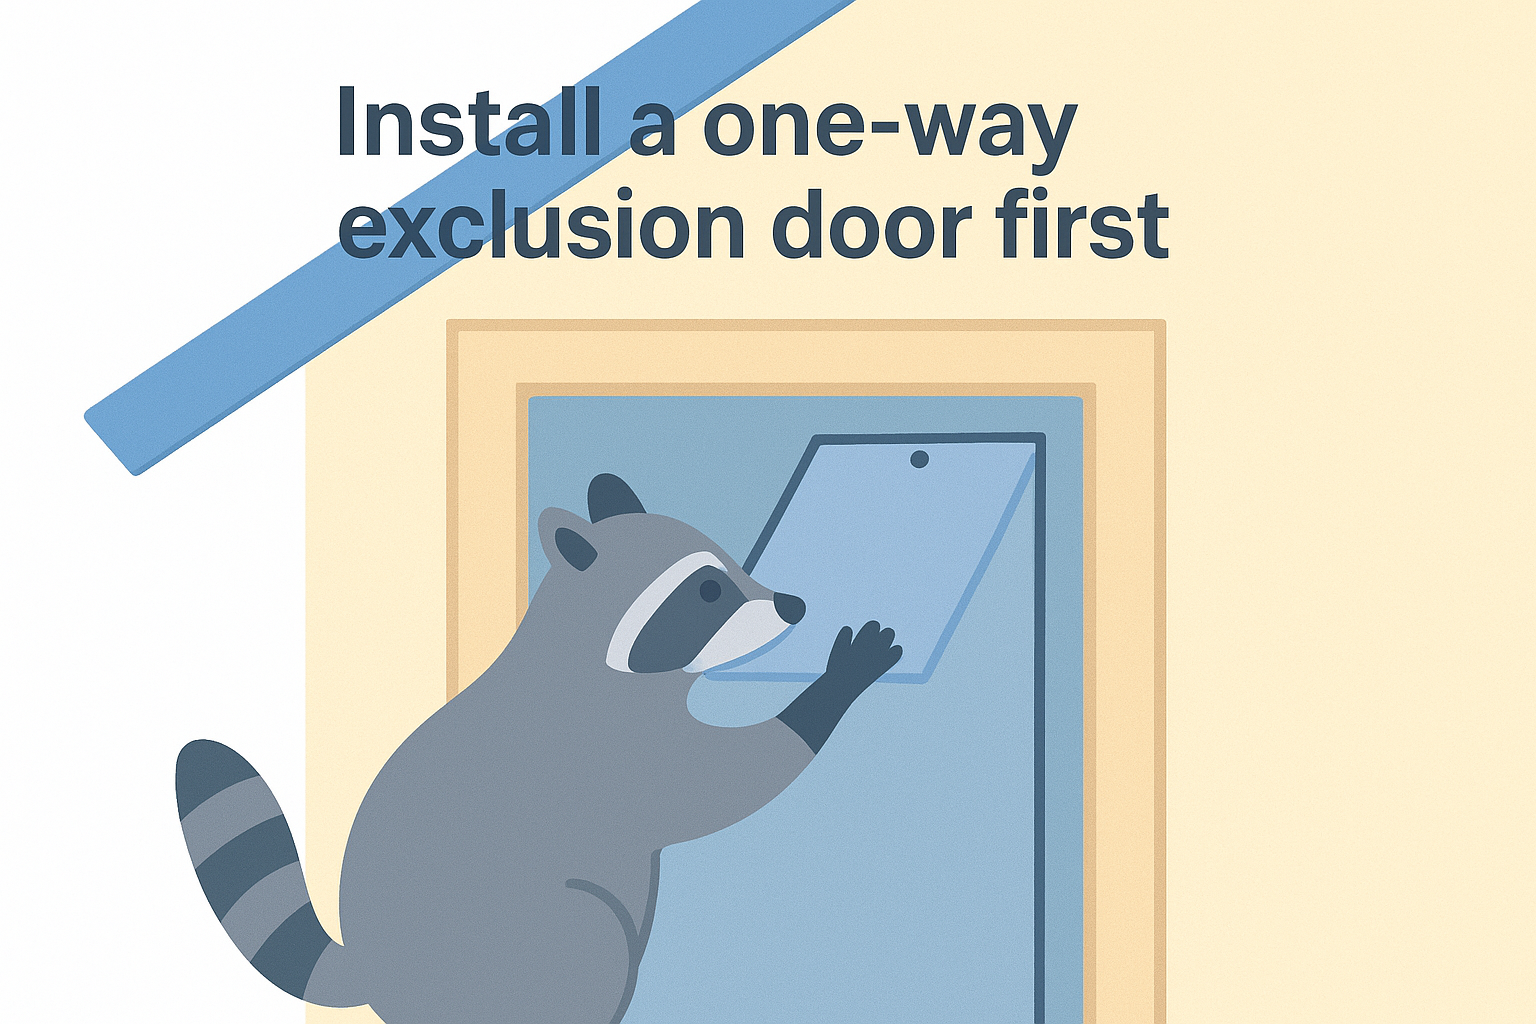
You can purchase one-way wildlife exclusion doors at most hardware stores. Attach the door securely over the entry point using construction screws , not staples, which raccoons can pull free with minimal effort.
Do not install a one-way door if you suspect a nursing mother is inside with kits; wait until the family group is moving together before blocking the primary exit.
Seal remaining entry points permanently
After confirming the raccoon is gone, remove the one-way door and seal every gap you identified in Step 1. Use heavy-gauge galvanized hardware cloth (half-inch mesh) cut slightly oversized so you can fold the edges against the frame for a tight fit. Cover every attic vent with the same material secured by construction screws into the wood framing.
Here are the materials you need for a lasting seal:
- Half-inch galvanized hardware cloth for vents and larger gaps
- Hydraulic cement or metal flashing for gaps along the roofline and chimney base
- Foam backer rod plus paintable caulk for small cracks under one inch wide
- Sheet metal screws to anchor all hardware cloth securely
Check every sealed point after the first heavy rain to confirm nothing has shifted or separated.
Step 4. Clean, sanitize, and fix damage
Sealing the attic stops the immediate problem, but the interior still holds significant health hazards from raccoon waste and structural damage that worsens over time if you leave it alone. This final step in how to get raccoons out of the attic turns a secured space back into a safe one.
Remove contaminated insulation
Raccoon latrines destroy insulation fast. The urine and feces soak into fiberglass batts or blown-in cellulose , compressing the material, eliminating its R-value, and creating a concentrated source of roundworm eggs. Bag and remove every section of insulation that shows staining, matting, or odor , even if the visible contamination looks limited. The soiling typically spreads further than what's visible to the naked eye.
Before removing anything, put on an N95 respirator, disposable coveralls, and nitrile gloves . Seal all removed insulation in heavy plastic contractor bags before carrying them through your living space.
Baylisascaris roundworm eggs can survive in soil and insulation for years, so treating contaminated material as hazardous waste protects your household long after the raccoon is gone.
Disinfect the attic surfaces
After removing contaminated insulation, spray all exposed wood framing, subfloor decking, and attic surfaces with an enzyme-based cleaner designed for wildlife waste. These cleaners break down the organic compounds that standard disinfectants leave behind. Follow up with a 10% bleach solution and let everything air dry completely before installing new insulation.
Here are the basic supplies you need for a thorough attic disinfection:
- Enzyme-based wildlife cleaner for organic waste breakdown
- Bleach and water mixed at a 1:9 ratio for a second-pass disinfection
- Garden pump sprayer to apply solutions evenly across wood surfaces
- Heavy plastic contractor bags for all contaminated material removal
Assess and repair structural damage
Walk the entire attic and look for chewed wiring, torn vapor barriers, and compromised roof sheathing . Raccoons frequently gnaw on plastic wire insulation, which creates a fire risk that's easy to miss during a quick scan. Mark every damaged wire, joist, or sheathing section with tape so you can address them in order of severity. If you find chewed electrical wiring, contact a licensed electrician before re-insulating.
What to do next
You now have a complete, step-by-step framework for how to get raccoons out of the attic , from confirming the infestation to sanitizing the space after they're gone. Following each step in order, confirming activity, applying deterrents, sealing every entry point, and cleaning up contamination, gives you the best shot at solving this problem permanently without having a raccoon return next season.
Some situations go beyond what a DIY approach can safely handle. If you find damaged wiring, a nursing mother with kits, or extensive insulation contamination , the risk and the work required goes up considerably. That's when bringing in a licensed professional saves you time, money, and potential health exposure. Defender Termite & Pest Management has served Sacramento homeowners since 1999, and our team handles wildlife removal, attic cleanup, and structural repairs under one roof. Get a free pest control estimate and let us assess the damage before it gets worse.