
How to Repair Dry Rot in Wood: Step-by-Step DIY Guide
That soft, crumbly patch on your window sill or deck post didn't show up overnight. Once you know how to repair dry rot in wood , you can stop small damage from turning into a full board replacement or, worse, a structural problem hiding behind your siding. Dry rot is a fungus that feeds on wood, and it spreads fastest in humid crawl spaces and shaded exterior trim around Sacramento homes.
This guide walks you through the exact DIY process: how to spot active dry rot versus old damage, dig out the soft material, and rebuild the wood using wood hardener and epoxy filler . You'll get product recommendations, drying times, and sanding tips so the repair holds up outdoors for years, not months.
We'll also cover when a patch job isn't enough. Some dry rot points to a moisture source or termite activity underneath, and repairing the surface without fixing the cause just invites the problem back. If you hit that point, our team at Defender Termite and Pest Management handles both the pest inspection and the structural wood repair, so you're not stuck calling two different contractors.
What is dry rot and can you fix it yourself?
Dry rot is a wood-eating fungus, not a description of dry wood. The scientific name is Serpula lacrymans , and it needs a moisture source to get started, usually a roof leak, a failed gutter, or a crawl space with poor ventilation. Once the fungus takes hold, it breaks down the cellulose that gives wood its strength, leaving behind a crumbly, lightweight texture that looks dry and cracked even though the damage started with water. That's why homeowners often miss it until the wood collapses under light pressure.
Dry rot doesn't need standing water to spread, just enough humidity to keep the fungus fed, which is why it shows up in places you rarely check.
Dry rot vs. wet rot vs. termite damage
Before you grab a chisel, confirm what you're actually dealing with. Wet rot stays wet and soft, while dry rot dries out and cracks into cube-shaped chunks. Termite damage looks different again, with hollowed-out galleries and mud tubes nearby.
| Damage Type | Texture | Common Location | Needs Pest Treatment? |
|---|---|---|---|
| Dry rot | Crumbly, cube-cracked, brittle | Window sills, deck posts, trim | No, but needs fungicide |
| Wet rot | Soft, spongy, dark, wet | Areas with constant moisture | No |
| Termite damage | Hollow, layered, mud tubes present | Framing, sill plates, fence posts | Yes, always |
When you can DIY the repair
Small, isolated patches of dry rot on trim, sills, or railings are usually good DIY candidates, especially if the wood isn't load-bearing. You're a strong candidate for this project if:
- The soft spot is smaller than a baseball
- The wood isn't part of a load-bearing beam or joist
- You've already fixed the moisture source causing the rot
- There's no termite activity or musty odor nearby
If any of those don't check out, especially termite signs, stop and get a professional inspection before you patch anything.
Step 1. Remove all the rotted wood
Grab a flathead screwdriver or a small chisel and start probing around the damaged area. Sound wood resists the tool and feels solid, while rotted wood gives way easily and crumbles into powder or small cubes. Keep digging outward until you hit that solid resistance on every side, because leaving even a small pocket of rot behind means the fungus keeps spreading under your new repair.
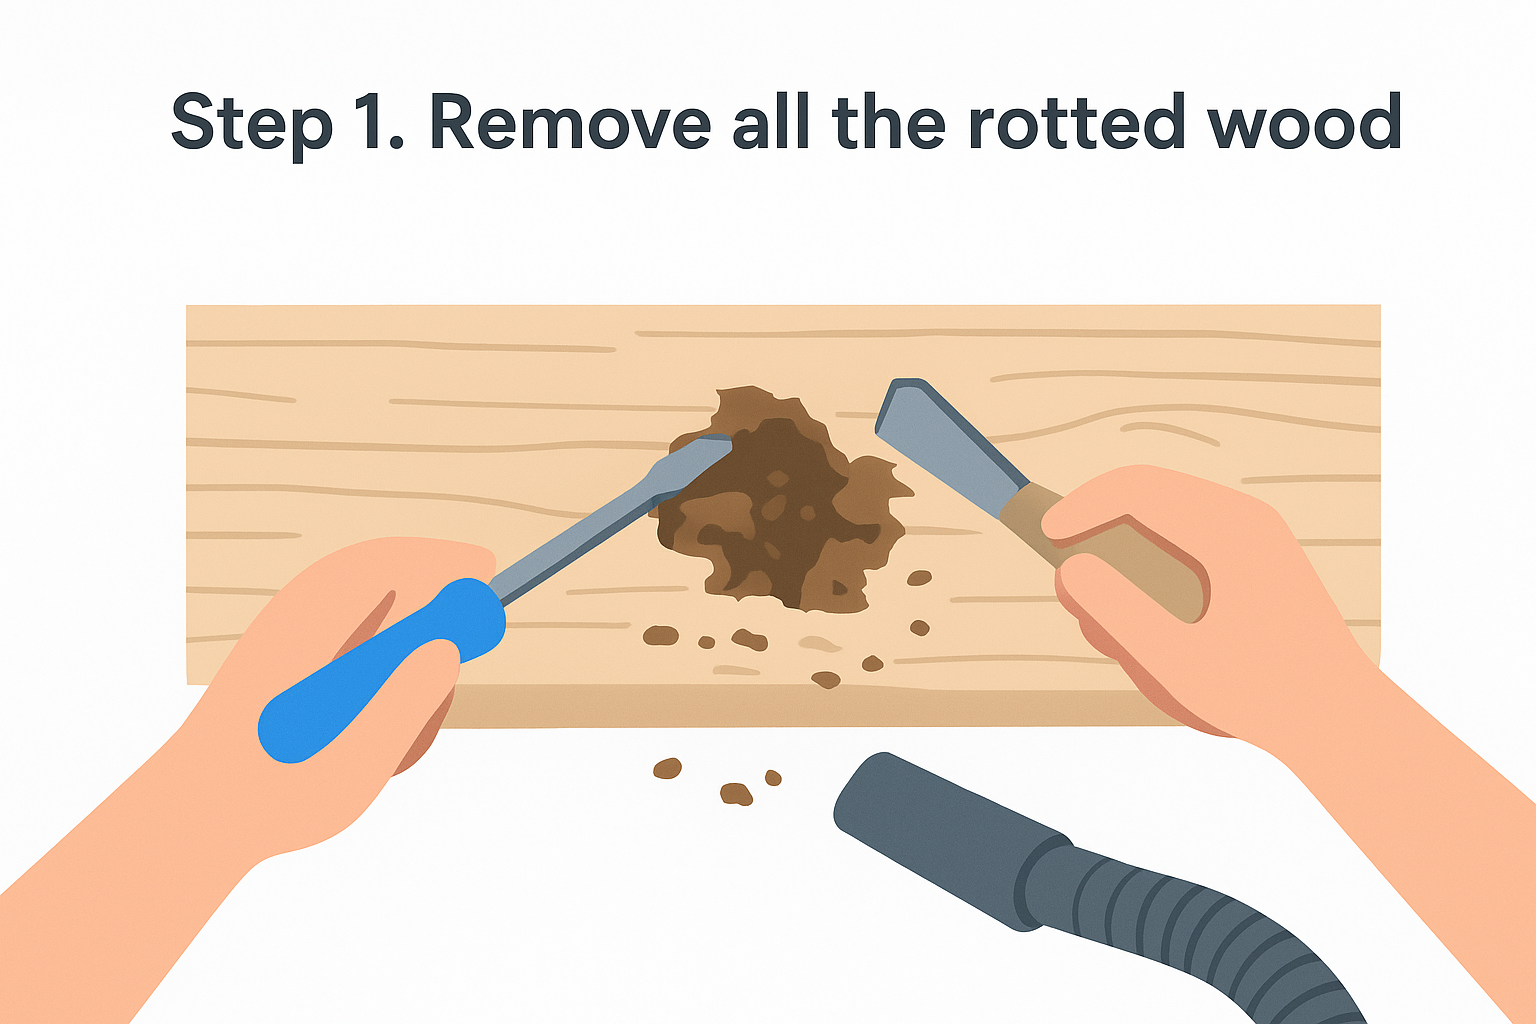
If your tool sinks in without effort, that wood has to go, no matter how small the spot looks on the surface.
Work in this order to avoid missing hidden damage:
- Scrape away loose, crumbly material with the chisel
- Dig deeper along the grain until the wood resists the tool
- Check adjacent boards and corners for softness, since rot often travels sideways
- Vacuum out the debris so you can see the true extent of the cavity
Don't stop at "close enough." A shop vacuum helps you clear dust from cracks so you can spot any remaining soft fibers. If the cavity runs deeper than an inch or extends into a corner joint, take a photo before you keep going. That reference helps you gauge how much epoxy filler you'll need later and whether the wood still has enough structure left to support a repair at all.
Step 2. Treat the area with fungicide and wood hardener
Once you've cleared every trace of soft wood, spray the entire cavity with a borate-based fungicide to kill any remaining fungal spores hiding in the surrounding fibers. Products like Bora-Care or a similar borate solution soak into the wood grain and stop the fungus from regrowing under your repair, which matters more than most DIYers realize since surface cleaning alone won't reach spores deep in the pores.
Skipping the fungicide step is the number one reason DIY dry rot repairs fail within a year.
Let the fungicide dry fully, usually 24 hours, before moving to the hardener stage. Wood hardener is a thin, penetrating epoxy resin that soaks into the softened wood around your excavated cavity and turns it rock solid again, giving your filler something stable to bond to.
Apply it with these steps:
- Brush or drip the hardener liberally onto exposed wood, including the edges of the cavity
- Keep applying until the wood stops absorbing liquid, since dry rot soaks it up fast
- Let it cure per the label, typically 15 to 30 minutes for tacky, several hours for full hardness
- Press a fingernail into the treated area; it should resist, not dent
Don't rush this cure time. A hardener that hasn't fully set won't give your epoxy filler the solid base it needs to hold up outdoors.
Step 3. Rebuild the wood with epoxy filler
Now that the hardener has cured, it's time to rebuild the missing wood with a two-part epoxy filler , sometimes sold as wood putty or structural filler. Products like Abatron WoodEpox or a comparable marine-grade epoxy mix on the spot, so only mix what you'll use in the next 15 minutes before it starts to set.
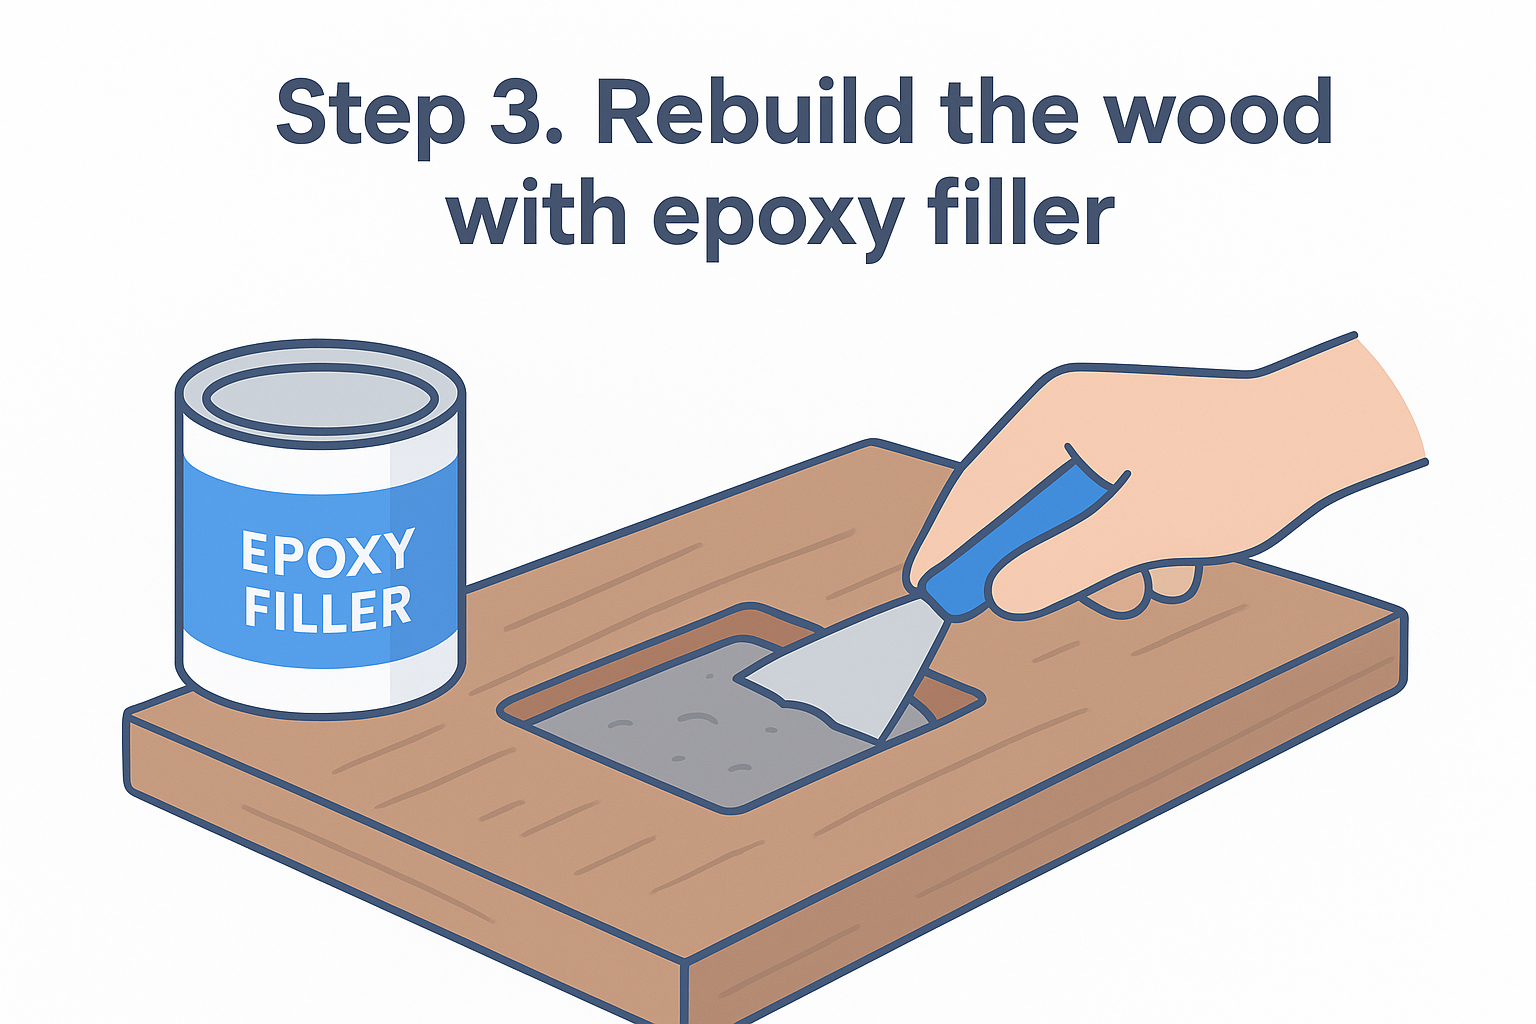
A properly filled cavity should feel as solid as the surrounding wood, not like a patch stuck on top of it.
Mixing and applying the filler
Follow this sequence for a repair that bonds properly and holds its shape:
- Knead the two epoxy components together until the color is uniform, usually a putty-gray or tan
- Press the filler firmly into the cavity with a putty knife, working it into every corner and edge
- Overfill slightly, since epoxy shrinks a bit as it cures
- Shape the surface roughly to match the original profile using a wet putty knife
Building up deep repairs in layers
For cavities deeper than half an inch, apply the epoxy in layers rather than one thick pour. Layering lets each application cure fully, which prevents the center from staying soft while the outside skins over. Give each layer the full cure time on the label, usually a few hours, before adding the next.
Step 4. Sand, prime, and paint the repair
Once the epoxy fully cures, usually 24 hours depending on temperature, grab medium-grit sandpaper (100 to 150 grit) and start shaping the patch flush with the surrounding wood. Sand in the direction of the grain, checking often with your hand since epoxy sands unevenly if you rush it with a power tool.
A repair that feels invisible under your palm will look invisible under paint, so sand until you can't find the edge.
Priming for weather protection
Bare epoxy repairs break down fast under UV light and rain, so priming isn't optional outdoors. Wipe the sanded area with a damp cloth to remove dust, then apply an oil-based exterior primer made for wood. Two thin coats beat one thick coat, since thick primer can crack as it dries.
Finishing with paint that matches
Finally, match your topcoat to the surrounding trim so the repair blends in and stays protected long-term. Follow this order:
- Let primer cure fully per the label, typically 4 to 6 hours
- Apply exterior-grade paint in two thin coats
- Caulk any hairline gaps between the patch and original wood before the final coat
- Inspect the repair again after the first hard rain to check the seal
Skipping paint leaves your hardener and epoxy work exposed to the same moisture that started the rot.
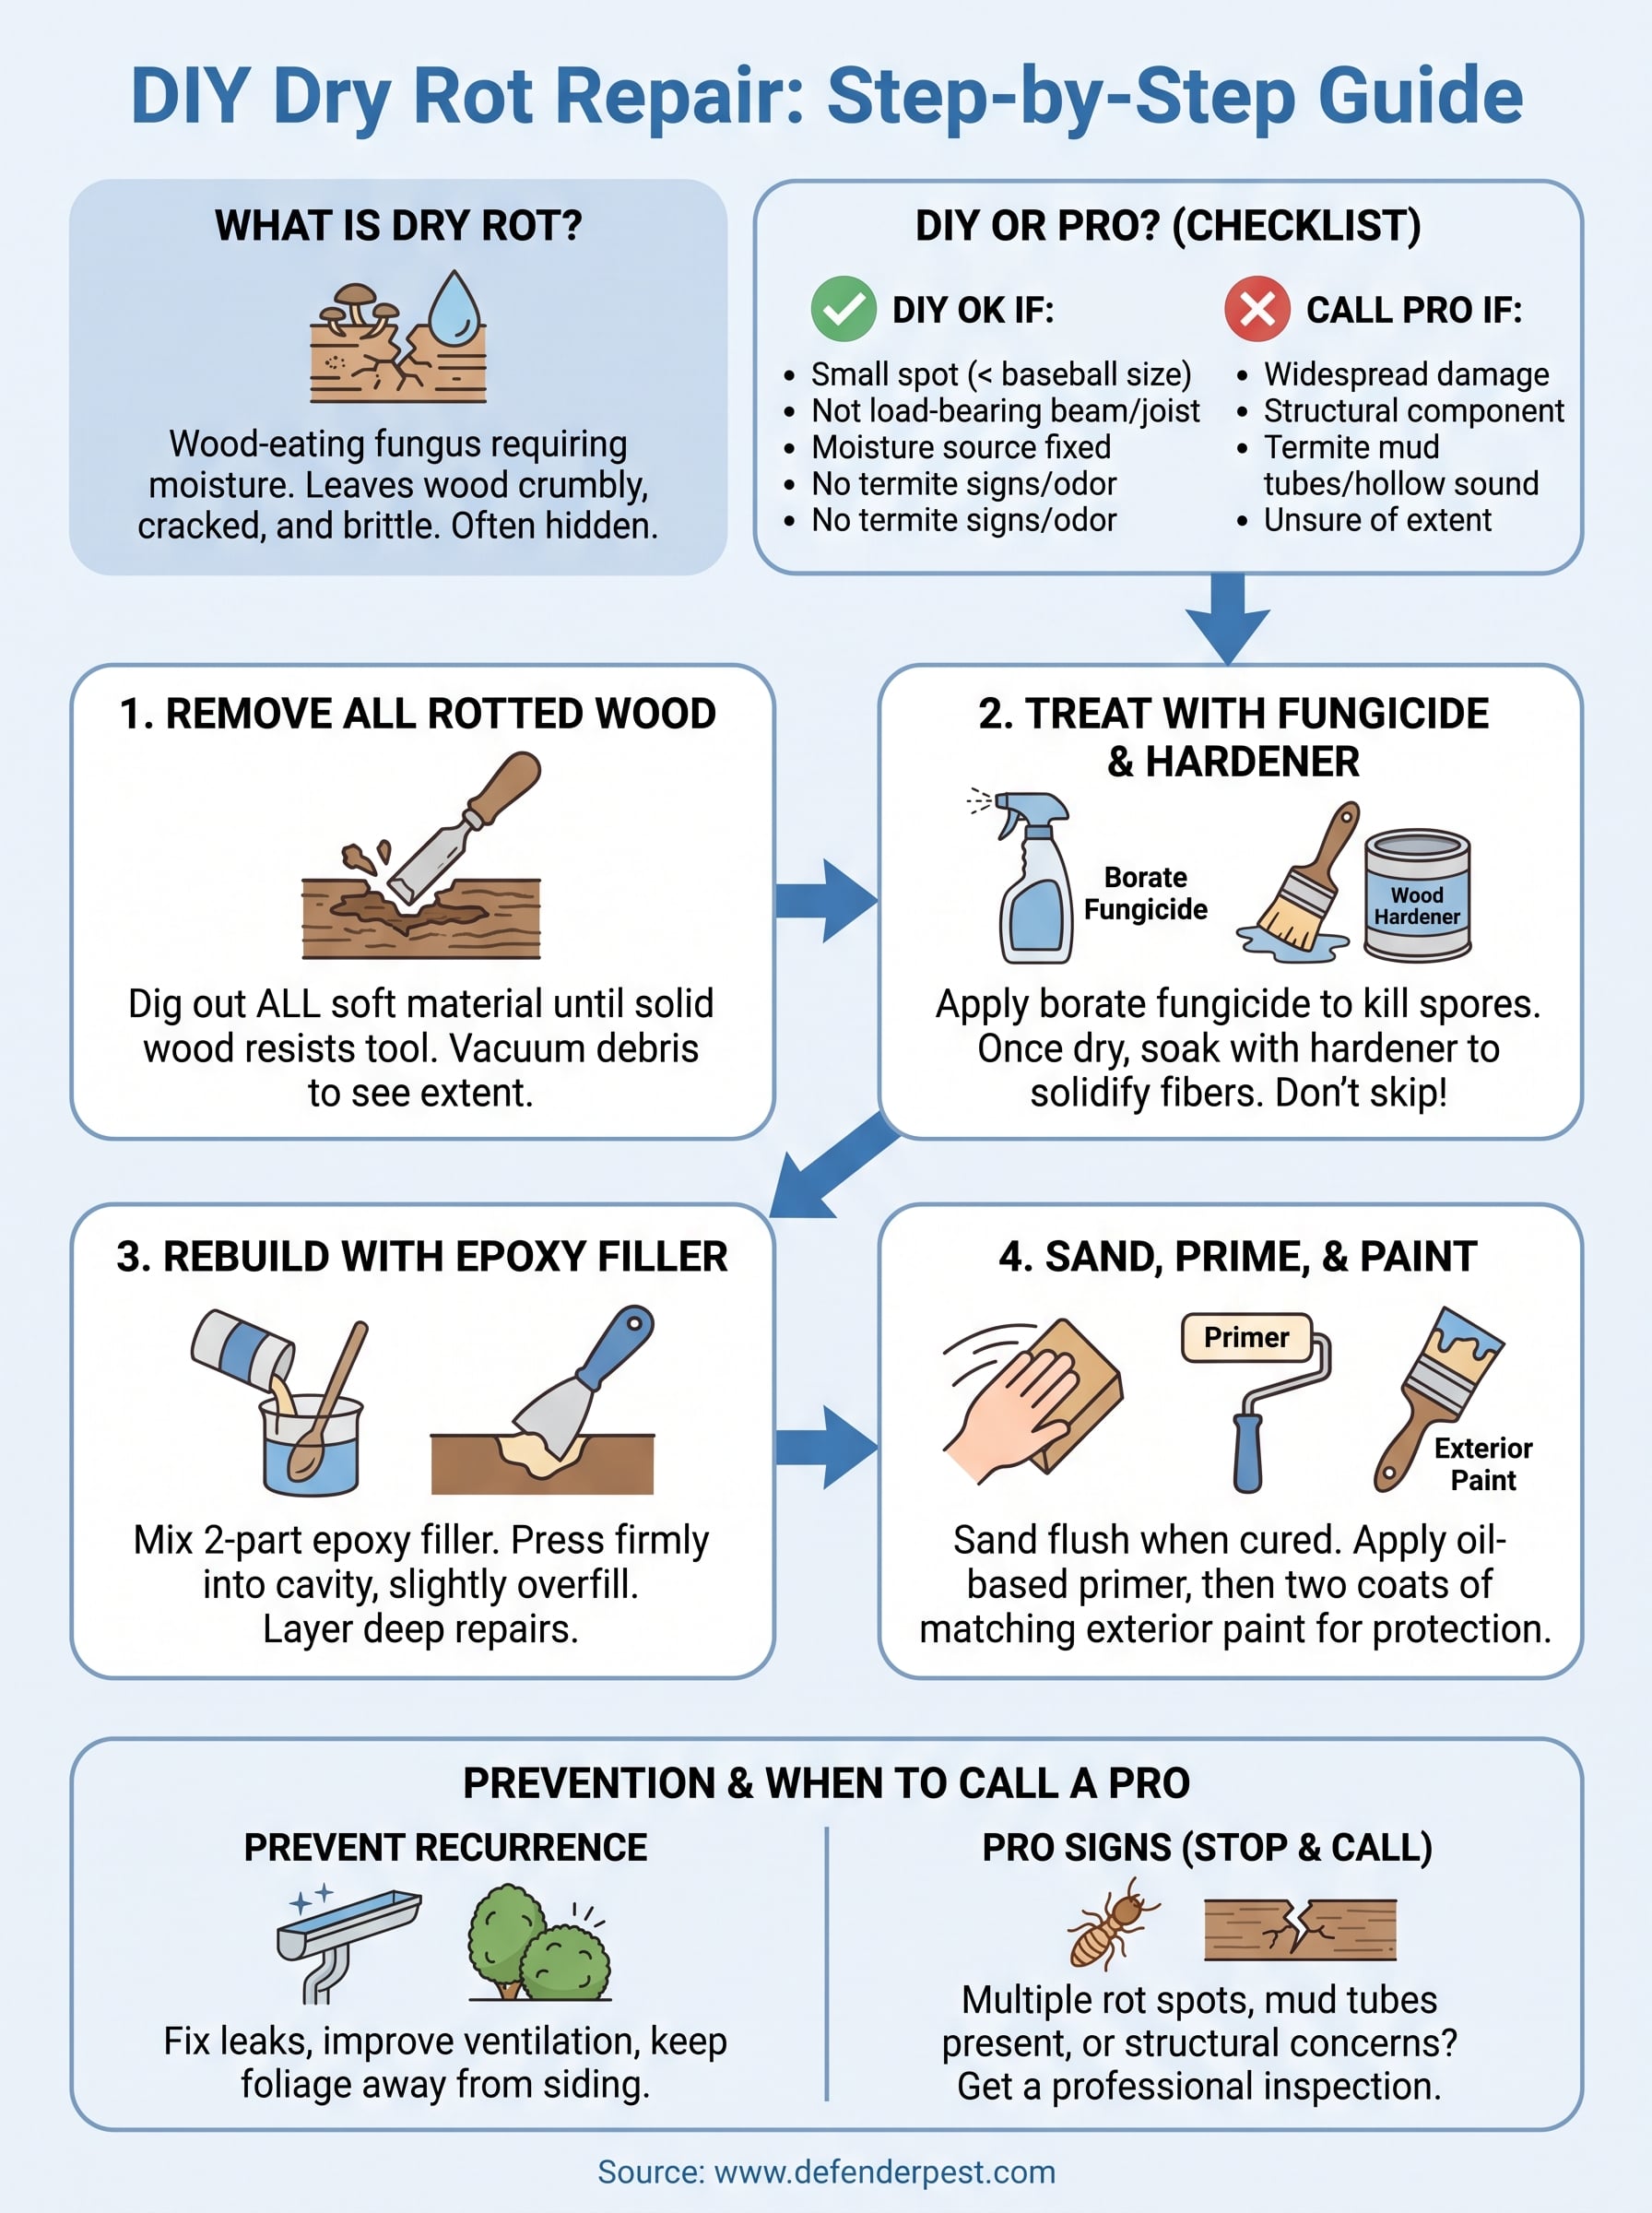
Keeping the rot from coming back
A solid repair only lasts if you fix what caused the rot in the first place. Walk your property twice a year and look at gutters, roof flashing, and grade slope near the foundation, since standing water near wood siding or sill plates is what invites fungus back in. Trim back shrubs that trap moisture against trim boards, and reseal caulk lines before winter rain season hits Sacramento.
Even a textbook repair can mask a bigger issue. If you're finding dry rot in more than one spot, or you notice mud tubes, hollow-sounding wood, or a musty smell near the damage, that's not a fungicide problem anymore. Those signs point toward termite activity , and no amount of epoxy filler fixes that.
When you're not sure what you're dealing with, don't guess with a screwdriver and hope for the best. Get a free inspection from Defender Termite and Pest Management and let us find the actual source before more of your home ends up needing repair.